
Jan 29, 2015
Blog Design Team: True Blue Valentine
Happy Thursday, crafty friends! Today, Blog Team Designer Julia Stainton shows us how to tone down the ‘girlie’ for a Valentine’s project that uses non-traditional blue! Check things out below…

Julia’s Notes: I love all the pinks and reds of Valentine’s Day, but as a mom with many
boys, my sons tend to get a little overwhelmed by all that pink! My
solution was to create a card and garland that was still sweet and fun
but toned down on the ‘girlie’ side of things with some cool blue.


Julia’s Notes: To
create this design, I embossed 2/3 of the main panel cut from Salt
Water Taffy cardstock.

Julia’s Notes: Many of the Taylored Expressions sequin sets can
be used for more than one holiday and I’ve pulled out the clear, silver
and pink sequins from the Gingerbread Lane bottle and used them as
accents for this valentine design. The Lots of Dots Embossing Folder is
perfect for adding in sequins onto some of the embossed dots. (Hint: Glossy
Accents makes the perfect adhesive for this.)
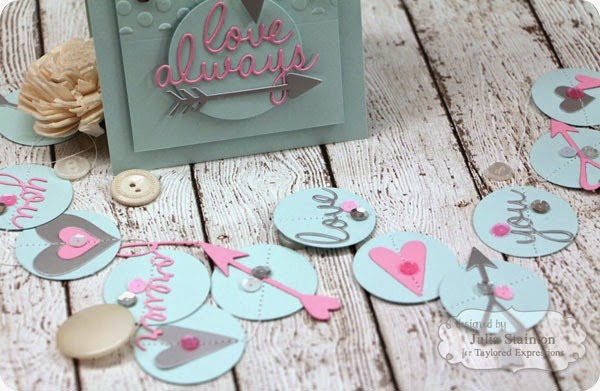
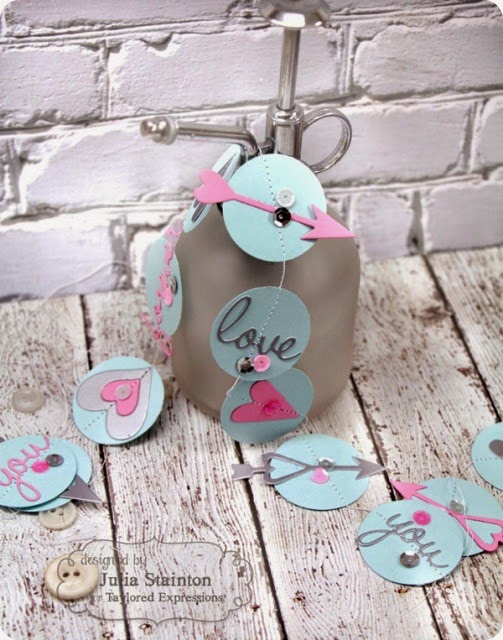
Julia’s Notes: I’ve also created a
fun coordinating garland to this set for some sweet holiday decor
accents. The garland is created from Salt Water Taffy; I punched 1.5″
circles. Die-cut hearts, words and arrows were cut from silver foil
paper and Strawberry Milkshake cardstock using the February Script and
Cupid’s Arrows dies. After adhering the die-cut accents, I stitched the
garland together with my sewing machine. I like to leave about 5
stitches between each circle to allow a little space. Make sure you
leave a long thread tail on each end of the garland for hanging!
Thanks so much, Julia for sharing your true blue Valentine ideas! Be sure to check out Julia’s blog, Belle Papier to see more of her lovely projects. Tune in tomorrow for pretty felt project from Lea Lawson!

           |
