TE BLOG
  • FB Live Schedule
  • Meet Taylor
  • Contact
×
  • The Perfect Kit for Plant Moms & Dads!
  • Introducing the Love Grows Here Cardmaking Kit – Available NOW!
  • NEW Craft Kit Coming SOON!
  • Honor Our Veterans & Celebrate the USA with NEW Products!
  • Celebrate the Red, White, & Blue with NEW Products – Available NOW!
    • What’s New
    • Shop
    • The TE Studio
    • Custom Stamps
    • Our Story
    • TE Blog
      • Placeholder for Dynamic Blog Menu
    • Contact Us
    • FB Live Schedule
    • Meet Taylor
    • Contact

    May 13, 2015

    Blog Design Team: Celebrate You

    How is your mid-week day going, crafty friends? Yesterday, we showed off a fun graduation card from designer Amy Sheffer. Today, we’re keeping up with graduation season with Blog Design Team member Amy Kolling as she shows us how to create a rainbow of fun with our Shining Star Cutting Plate!

    Now, let’s hear from Amy about her project…

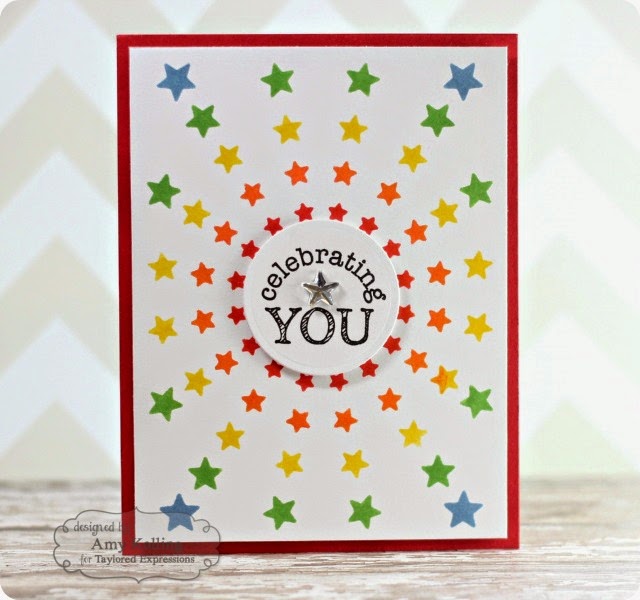
    With May being a graduation month, I have a colorful and easy-to-create card to share that’s perfect for anyone reaching a school milestone or achievement!  

    I started by die-cutting the Shining Star Cutting Plate
    out of white cardstock to create my “stencil”. I taped the die-cut
    stencil to a white card base with painters tape. I used
    various Distress Inks to create my “rainbow” of stars. I began by
    sponging Festive Berries Distress Ink for the center and working my way
    out with Ripe Persimmon, Mustard Seed, Mowed Lawn, and Faded Jeans. (Hint: I
    did mask a few areas so I wouldn’t overlap color.) 

    My original intention was
    for this card to be essentially a one layer card, but since I got carried
    away with the Distress Inks, I had to trim my inked panel down and
    layered it with foam adhesive onto Cherry Pop cardstock. (It’s always okay to switch things up if you are taken in another direction while crafting!)

    To finish this off, I stamped my sentiment from Shining Star Sentiments
    and die-cut it with a standard circle die. The sentiment was added to my
    card with foam adhesive and one single star shape was added with a glue dot. 

    Thanks so much, Amy, for sharing this awesome stenciled card! You can catch more of Amy’s design work on her blog, Stamp-n-Paradise.

    Premium Cardstock – Sugar Cube
    Premium Cardstock – Cherry Pop
    Shining Star Cutting Plate
    Shining Star Sentiments
    Ranger Mini Ink Blending Tool
    Ranger Mini Ink Blending Foams
    Tim Holtz Distress Ink – Mini Set 2
    Tim Holtz Distress Ink – Mini Set 7
    Tim Holtz Distress Ink – Mini Set 4
    Foam Tape – 1/16″ Thick
    Tim Holtz Distress Ink – Mini Set 4
    InLinkz.com

    • Posted by Taylor at 2:00 pm
    • |
    • 12 Comments
    • |
    • Add Comment
    • |
    • Link to this post

    Tags: Birthday, Blog Team


    PREV
    NEXT

    Subscribe to the TE Blog

    Sign up for all the latest crafty inspiration!

    Powered by FeedBlitz

    Facebook Live

    Tuesday & Thursday @ 10AM CST

    View Schedule
    Taylor with laptop in Ipad

    Navigate

    • About Taylor
    • Contact Us
    • Sitemap

    TE Mobile App

    • Google Play Store
    • Apple App Store

    Subscribe to our newsletter

    Get the latest updates on new products and upcoming sales.

    Powered by FeedBlitz

    Connect with Us

    1955 SE Oak Drive, Ankeny, IA 50021

    © 2015 Taylored Expressions