Jun 13, 2017
Crafty Storage Week: Gayatri’s Tiny Space!
Hey, hey, crafty friends! We are fresh off our June Release and happy packages will be landing on doorsteps filled with new crafting goodies! So, perhaps it’s only fitting that I’m featuring crafty storage tips from a few members of our fabulous Creative Team to help more than a few of our fans keep their stashes organized. *grin*
Today, designer Gayatri Murali shares some of her terrific tips on what to do when you are limited on space. Enjoy and get organized!

Notes from Gayatri…
My current craft room is very very tiny. I will say it’s a closet and not even a room! So I try to organize my craft items as much as possible so that I am not digging a huge pile to find things.
All my organization at the moment is temporary. I have a new house being built nearing completion and I have a bigger space there. I am also planning to do a custom fit out in the room. Hence all my current organization is very temporary, but it still works and have worked for me for the past four years. I will not change the system I have now, but will make them look prettier and add more finer details like labelling each and every die and stamp set, etc. I live in Australia and prefer to use what is available locally. So all my bins, file folders and other organization items are from my local store, but you can find similar items near you or in big box stores as well.
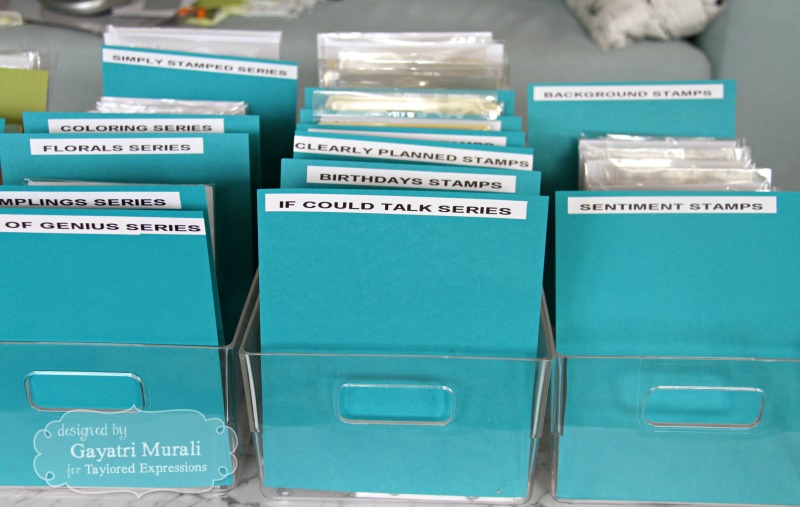
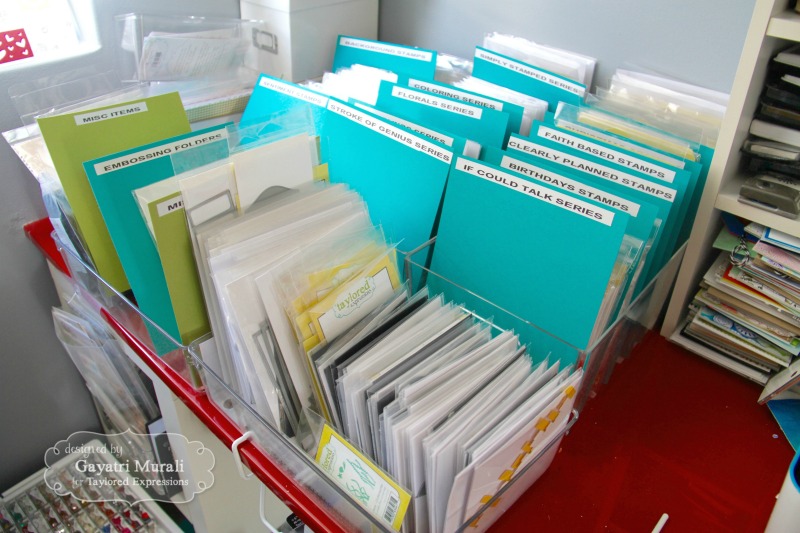
My stamp sets are in these clear acrylic storage bins. Cheap and available in several sizes – large and long, medium and long, small and square and narrow and long. I chose the large and long bins for my stamps. I have categorized them based on stamp series and size of the stamps. I have used some old unused cardstock cut to size to categorize them. I also added labels using a label maker.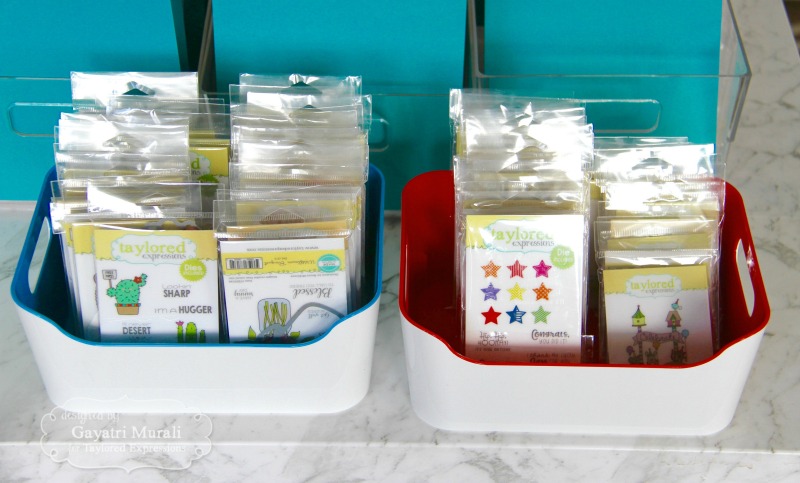
Most of my stamp set I have kept in their packaging except the ones where the packaging tore. For those, I used clear stamp storage pockets to store those stamp sets. (Eventually, all of them will be stored in the clear pockets.) I put the coordinating die on the other side of the pocket.
Why this system works for me: If I want to grab Summer Grumplings stamp set, I can browse through the Grumplings series category and pick the stamp set. Similarly, if I want a background stamp, I browse through the background stamp category and pick the stamp I want to use. I think I will follow the stamp system in my new craft room but make the system look prettier. This is where the bins sit in my craft room.
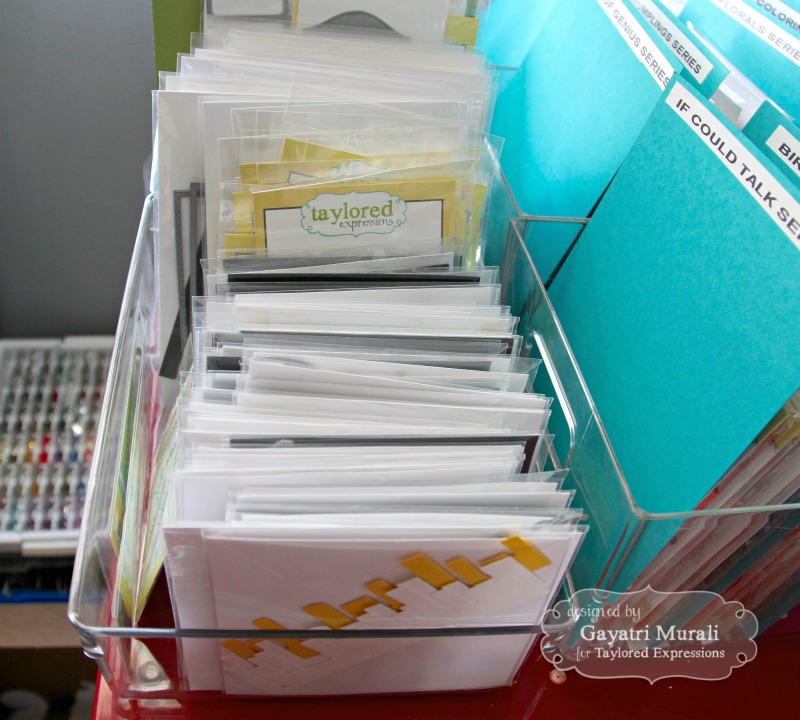
My dies are stored similarly to my stamp sets except these are stand alone dies. I used the stamp and die clear storage pockets to store them. The stamp pockets for larger dies and die pockets for the smaller dies. I have yet to label them, but I’m working on it! Being on the design team, I pretty much know the name of all the dies when I look at it, so I think it’s made me a bit lax! I have also clustered similarly themed dies into one pocket for the lack of storage space in my current craft room. I cannot wait to have more room!
My cardstock is stored in file folders I found in my local office supply store.
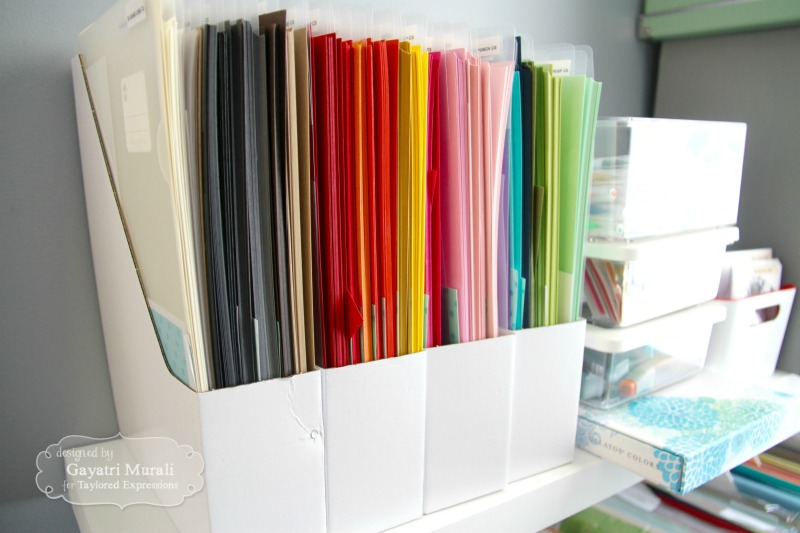
Each color is stored in a file folder and labeled with the name of the color. I have used magazine holders to store the file folders in rainbow order. All the neutral colors are stored in one magazine holder. The magazine holders are the cheap white cardboard ones from IKEA. All the scraps go behind the full size cardstock in the same file folder. I keep only larger pieces. Any pieces smaller than three inches are discarded. You can see some of the scraps peeking out in the photo.

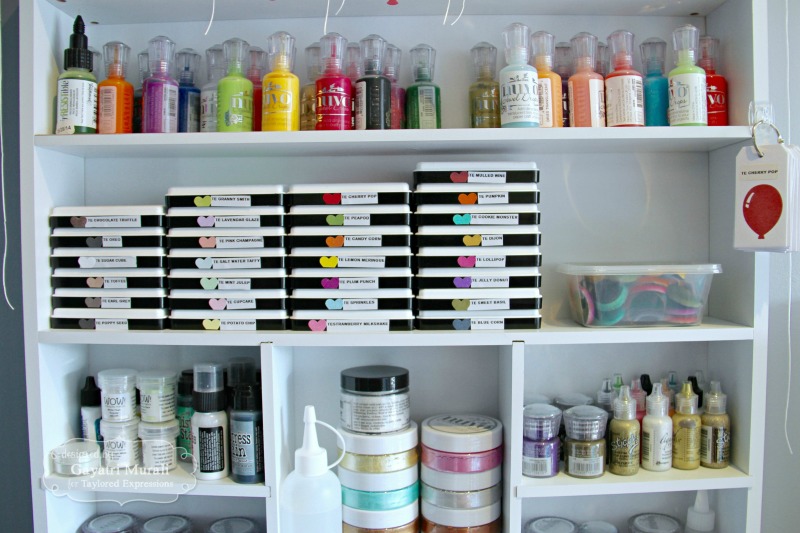
This is where I store my TE ink pads. All my other ink pads are in an IKEA “Alex” drawers. I do not want to mix my TE ink pads with the rest because I use them most often. I also have ink swatches for TE inks so I can pick my color combinations.
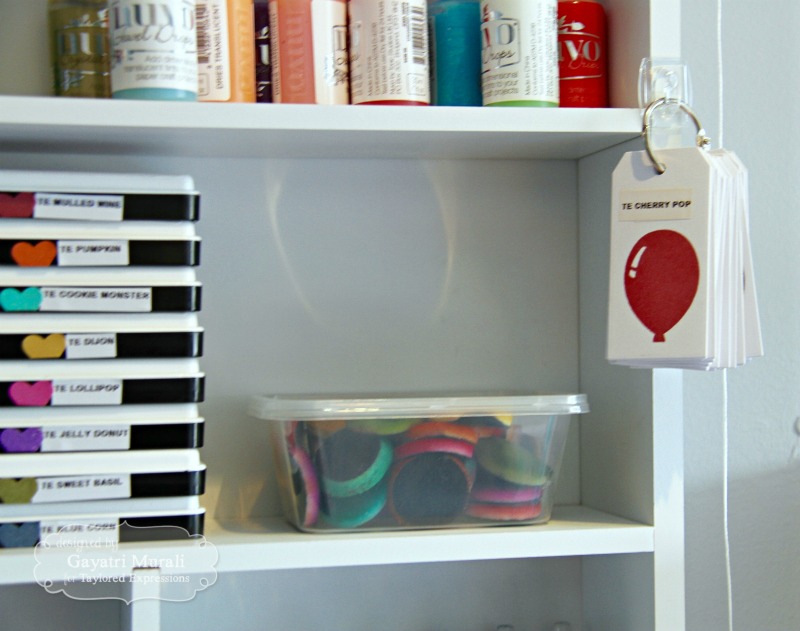
I also store the blending sponges in a plastic box next to the ink pads. This is a great way to recycle pads so they last longer!
I have made labels for the ink pads and stamped the colors using one of solid stamp from TE, punched out the color using my heart punch and adhered to the ink pads — Easy to see and pick the color ink pad I want to use!
These are simple storage ideas that I have picked up over the years from other bloggers/crafters in the global community. I hope they inspire you to organize. I am so excited with my new craft room, especially getting the room custom fitted.
Thank you so much, Gayatri, for sharing with us today! She’s promised to take photos and share her new custom craft room once her new home is ready and we can’t wait!
All of Gayatri’s photos of her wee space have got me amazed that she can produce the incredible work she creates in that little closet of hers. Here’s one of my favorite recent projects she sent us:
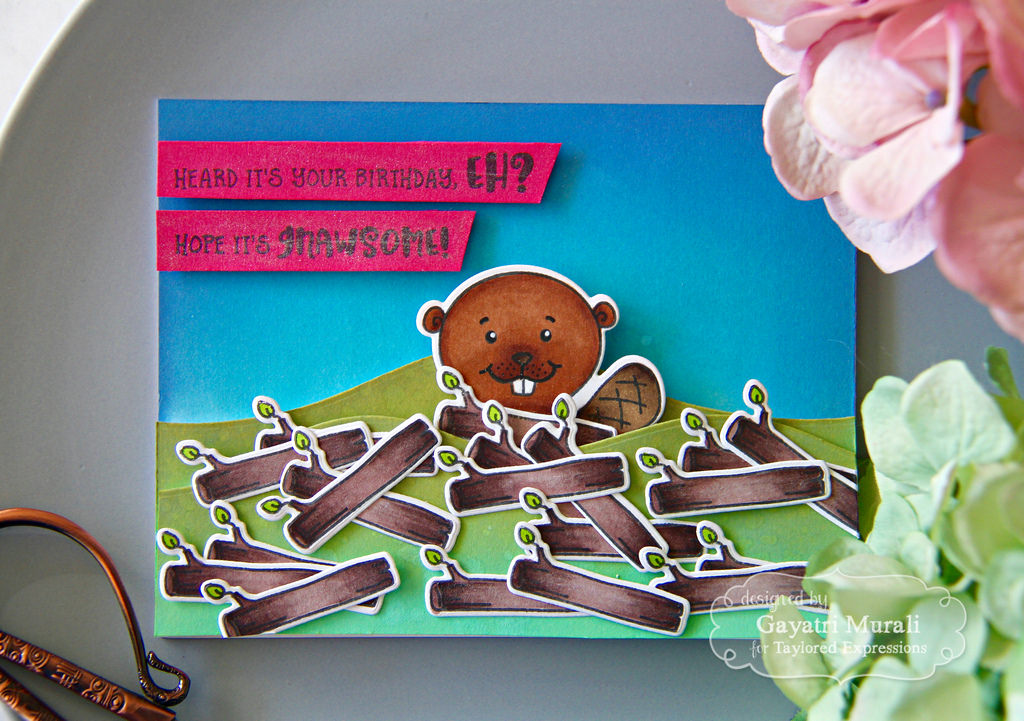
How cute is this card? Gayatri used our recently-released Busy Beaver Stamp & Die Combo and I can almost imagine a mischievous twinkle in that cute little critter’s eye amidst all those gnawed logs!
Be sure to visit Gayatri on her blog, Handmade by G3. Come back tomorrow as we share more storage tips!


