Feb 25, 2021
Create Beautiful Floral Cards Using NEW Easter & Spring Products!
Hey, crafty friends! It’s Heather here for one last day of inspiration for our Easter release at Taylored Expressions. It’s been a fun week and I feel uplifted and hopeful for the spring season that is coming soon! I am sure we will have a few more wintery days, but I can distract myself with flowers, bunnies, and Easter eggs! Today, I have a video to share with you from Emily Leiphart and several more projects from the TE Creative Team made with the new products from this release.
Here’s one last reminder about the Joyful Spring bundle that is available this week in the TE webstore:
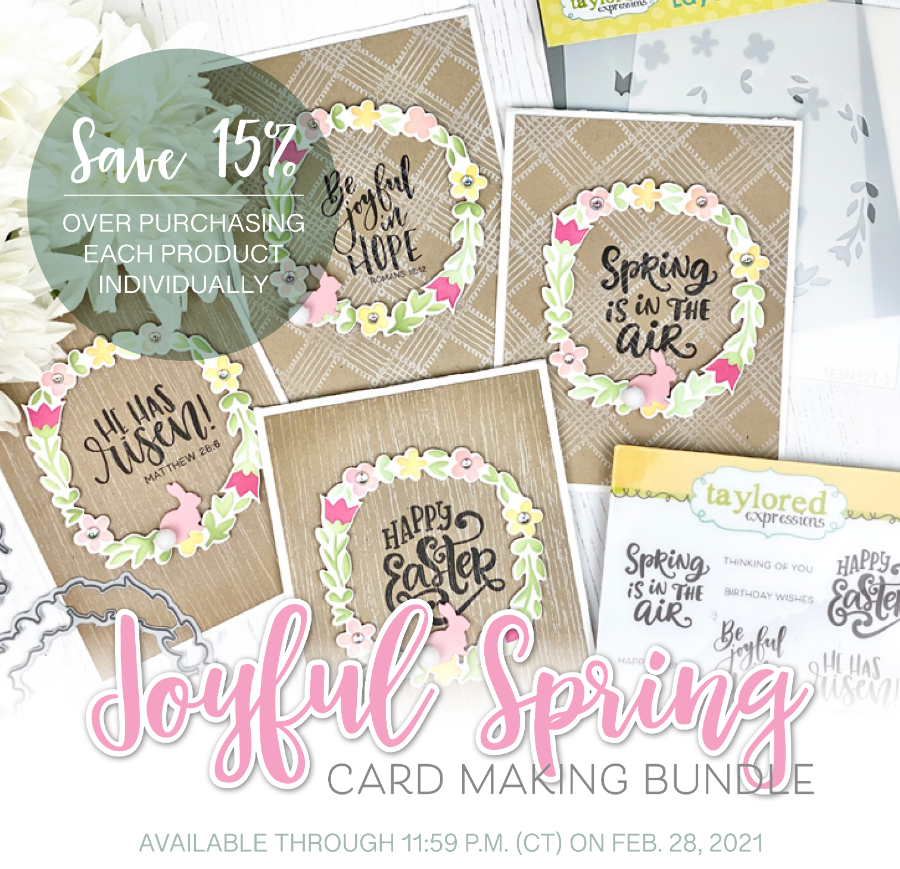
Tuesday, February 23rd, through Sunday, February 28th (or while supplies last), You can get the Joyful Spring Bundle for 15% off! The bundle includes the Spring Wreath Layered Stencil set, Spring Wreath die collection, and Be Joyful stamp set. The discounted bundle price is only available through Sunday, February 28th.
Click below to check out the new products in the TE webstore and keep scrolling for the inspiration!
- This release includes over 25 new products including new stamps, dies, stencils, and the cutest new wooden bunny embellishments!
- Our TE blog posts this week (Monday – Thursday) featured a new how-to tip, technique, or process video.
- Receive FREE shipping on orders of $50 or more in the United States!
- Earn a free, exclusive stamp with purchases of $100 or more. CLICK HERE for more information.
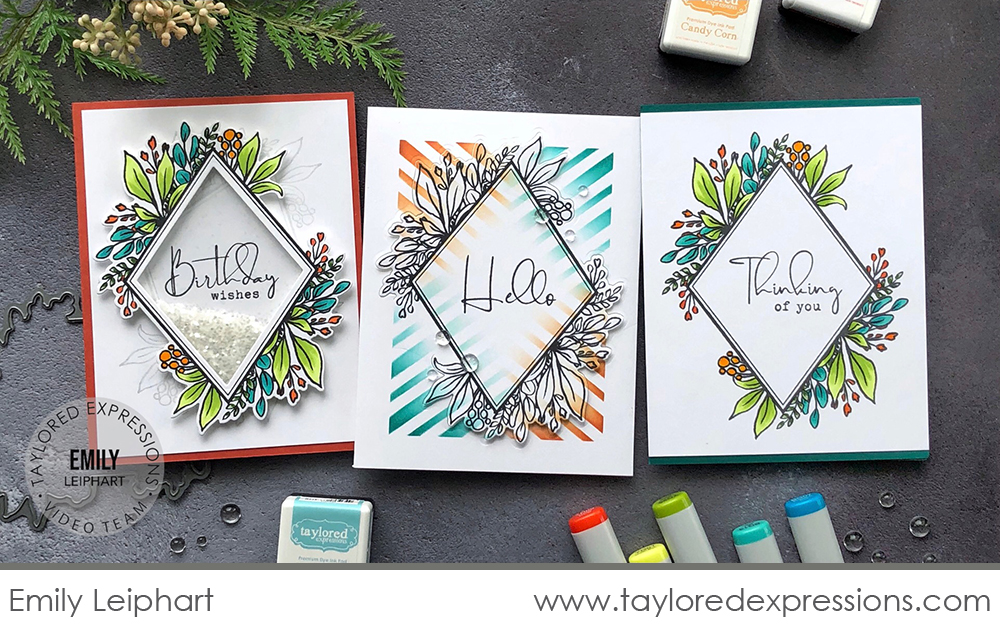
Today, Emily has a trio of cards to share with you that she created with the Diamond Botanical stamp set (+ coordinating dies) and Masking Stencils – Diamonds set. Watch the video below to see how she created them:
In the video, Emily shows you how she creates three cards with the Diamond Botanical stamp set. She stamps the frame image several times with Oreo ink on Sugar Cube cardstock for the different cards. One card she keeps things clean and simple: after coloring the frame image with Copic markers, she simply stamps the sentiment in the frame opening. On the next card, she adds color with a stencil and her blender brushes and does a partial die cutting technique to add a unique, dimensional effect. On the final card, Emily stamps the frame image at an angle to create the card background using Sea Salt ink, she colors the main image with Copic markers, and then uses the coordinating die to create a shaker card.
Here’s a closer look at the new products that Emily used on her projects featured in the video:
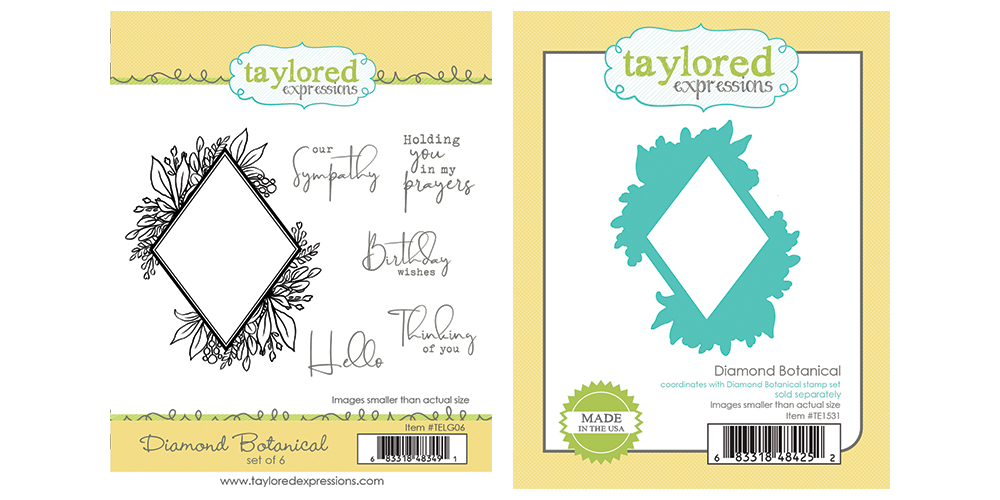
The Diamond Botanical stamp set features a diamond shaped frame that is adorned with botanical greenery. Pair the frame with one of the five greetings to create and elegant look that is versatile for many different occasions. We also now excited to offer the Diamond Botanical die to cut out the frame image.
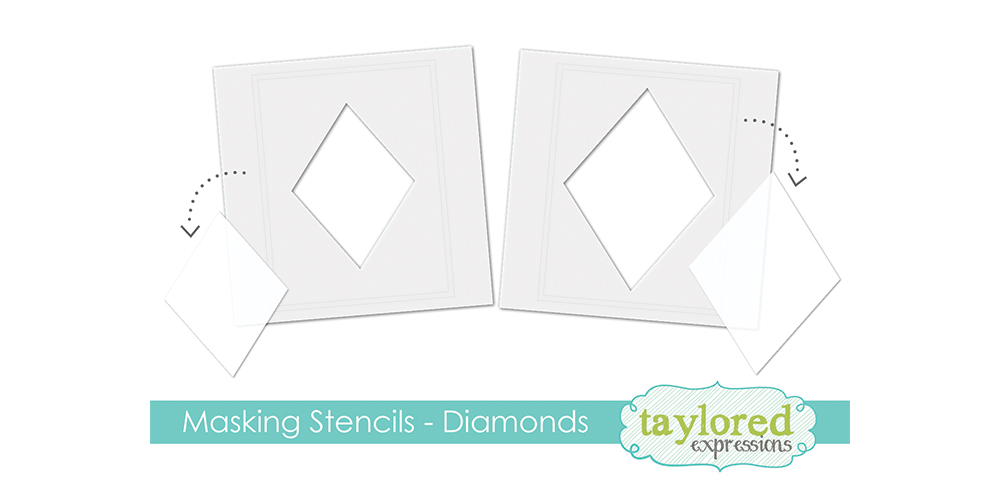
The Masking Stencils – Diamonds set was previously the incentive set you could earn during the month of December and will now be available to purchase. The diamond shape coordinates perfectly with the frame in the Diamond Botanical stamp set and you’l love using this masking stencil shape for other designs too. Use the innovative etched alignment guides to line up the masking stencils perfectly on your A2 card fronts and use the included insert shapes for even more masking possibilities!
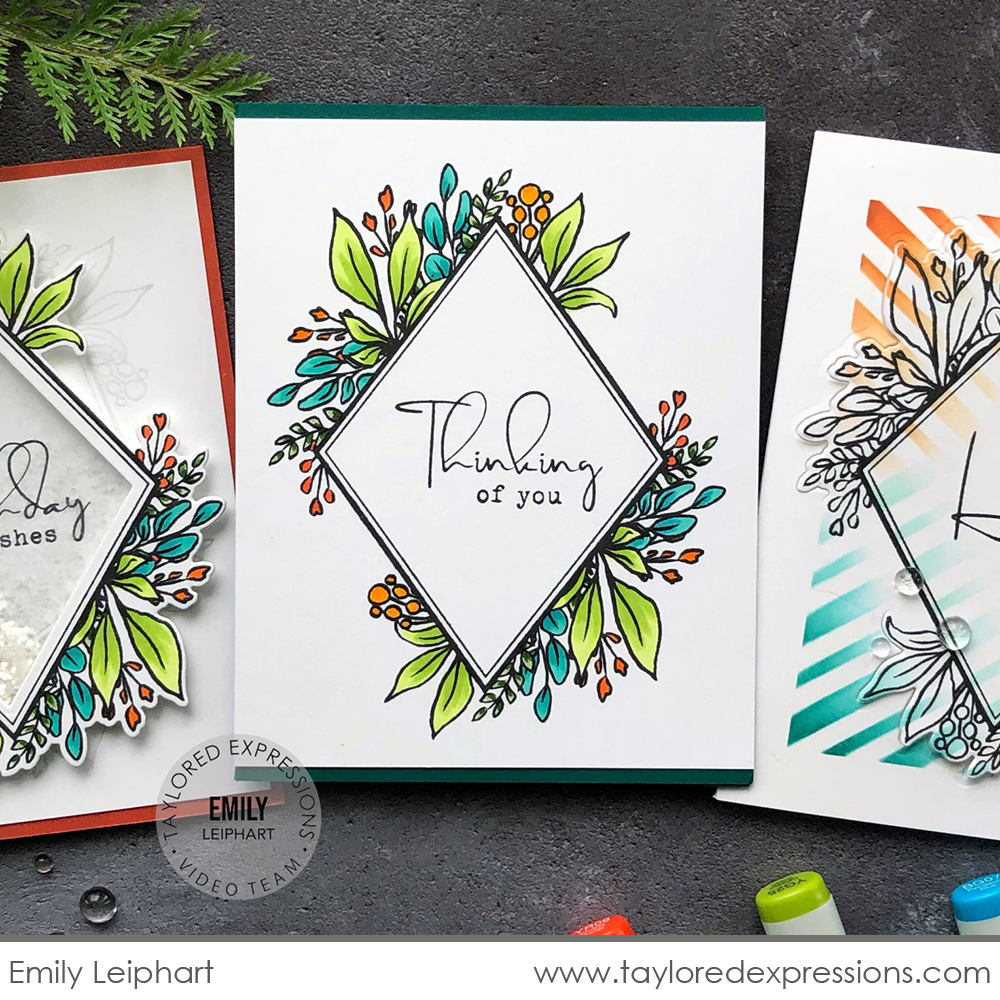
The Diamond Botanical frame image is large and fills up your A2 sized card front. You don’t necessarily need to add much to your projects once you have stamped and colored it with your favorite medium. Emily used Copic markers and in the video she shares a fast forward of how she colored the image. Keeping cards one layer like this also makes sending them in the mail a breeze.
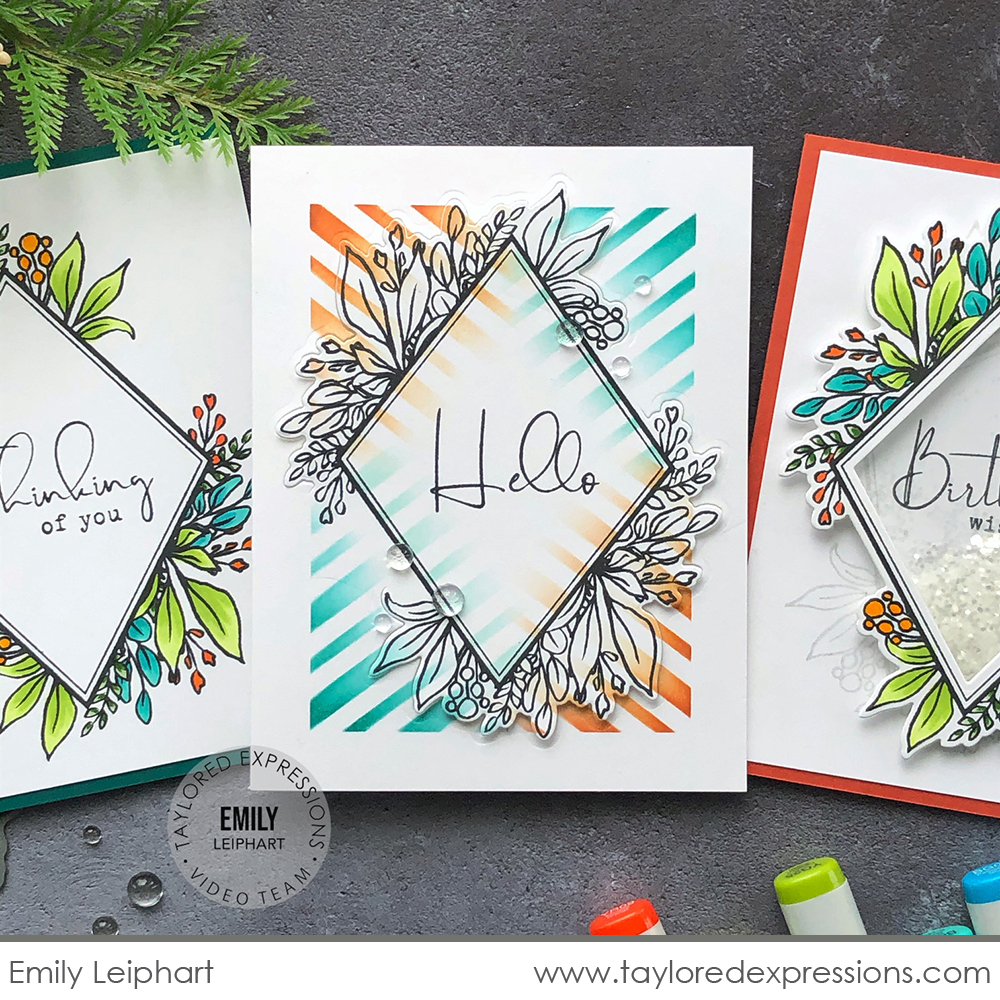
Instead of coloring the frame image, Emily used the Mini Slim Candy Cane Stripes stencil and her Blender Brushes to add color to this card. She used the Masking Stencils – Diamonds set to mask off part of the card to create the stunning fade effects in the striped design. Instead of cutting the whole image out, Emily used the outside piece of the coordinating die and cut just portions of it around the image – watch the video to see how she does it! She used foam squares to pop up the cut out areas and add a really unique dimensional look. Her finishing touch is a few Bits & Pieces – Clear Drip Drops and I love her fun story she tells in the video about her husband thinking he got water on her card!
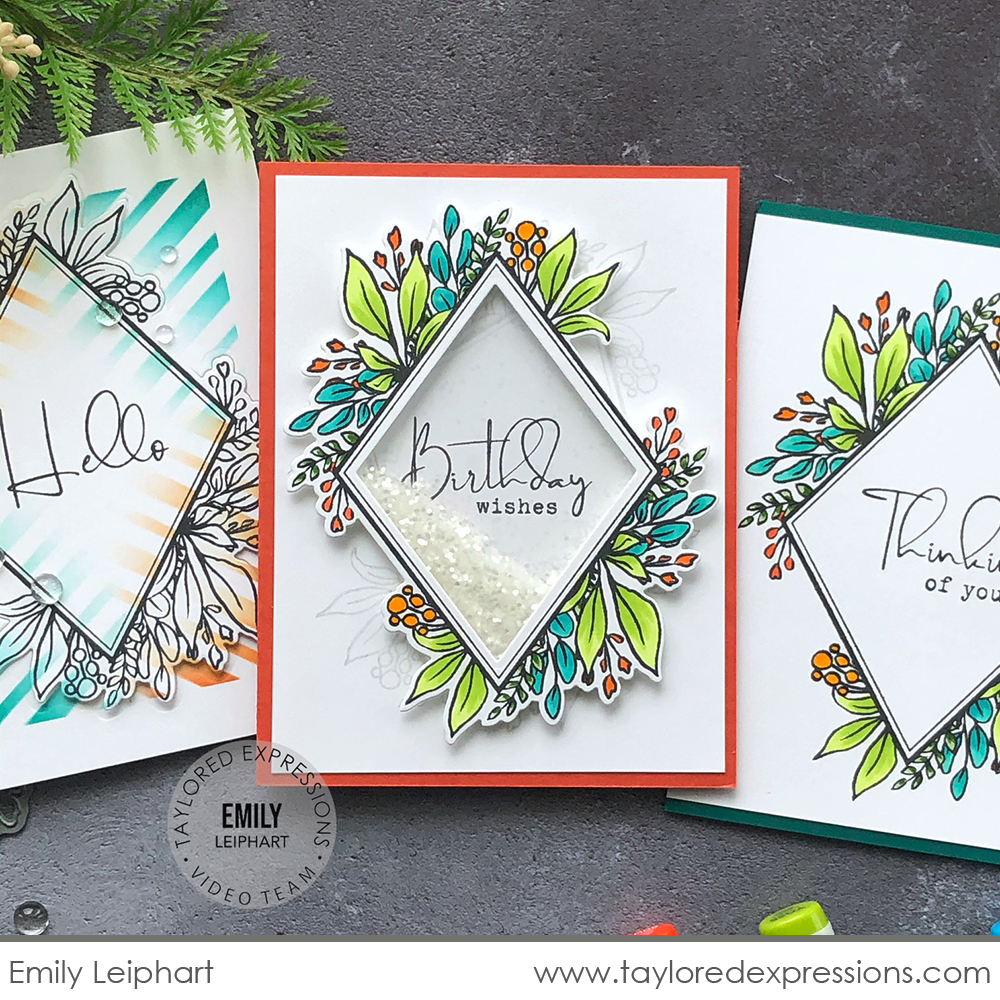
The final card is a shaker card that Emily created by cutting out the Copic colored image with both pieces of the coordinating die to create an opening in the frame, backing it with window acetate, and attaching it to her project with Foam Sticky Strips over a pile of glitter to fill her shaker. I also love the background effect that Emily created by stamping the main image at an angle in Sea Salt ink. Doing that added foliage that subtly fills in the areas around the frame.
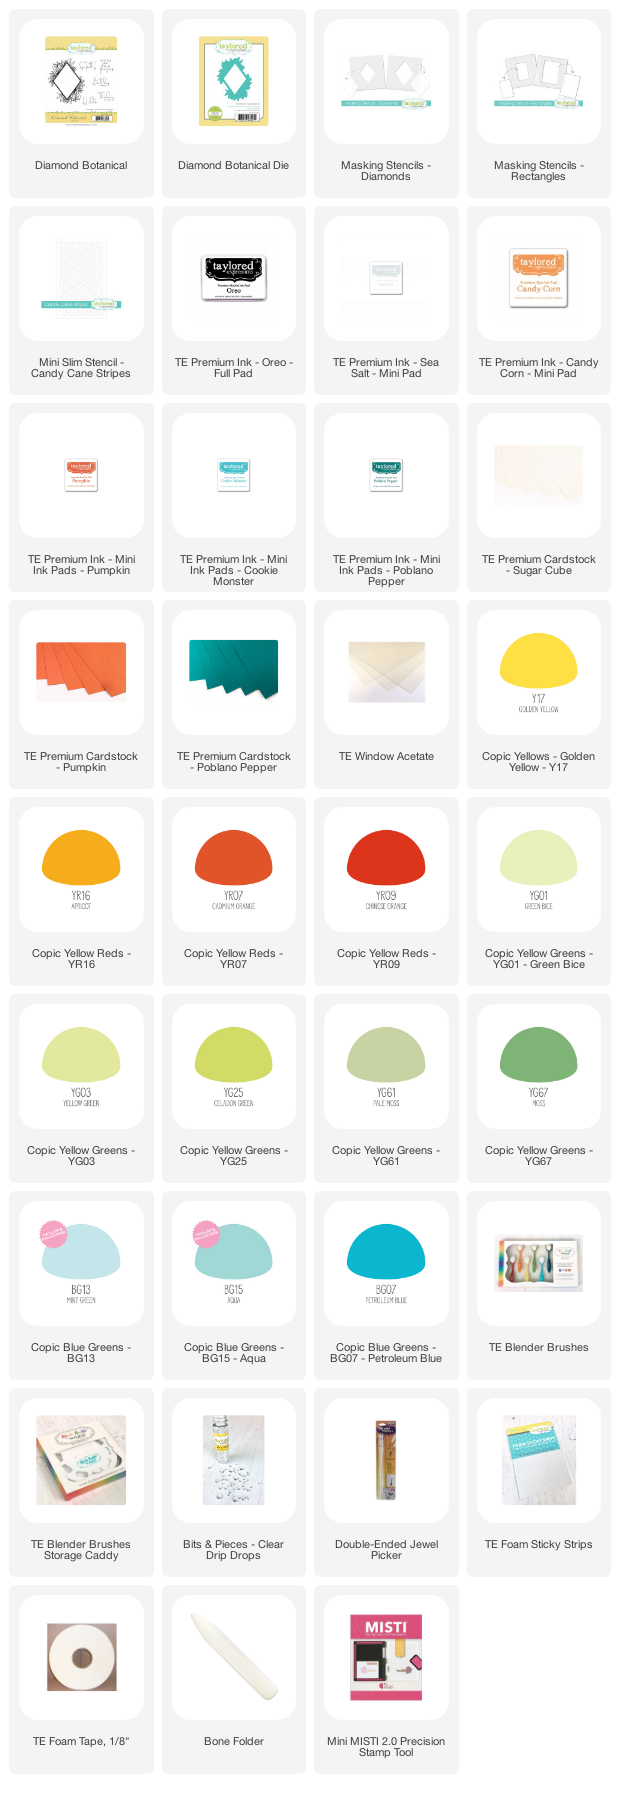
Emily shared so many great ideas for using the Diamond Botanical stamp set! Which one is your favorite? Check out the list below for the supplies that Emily used on this set of cards:

Here’s one more round up of inspiration from members of the TE Creative Team as well as a closer look at a few more of the new products that are available to purchase for our Easter release!
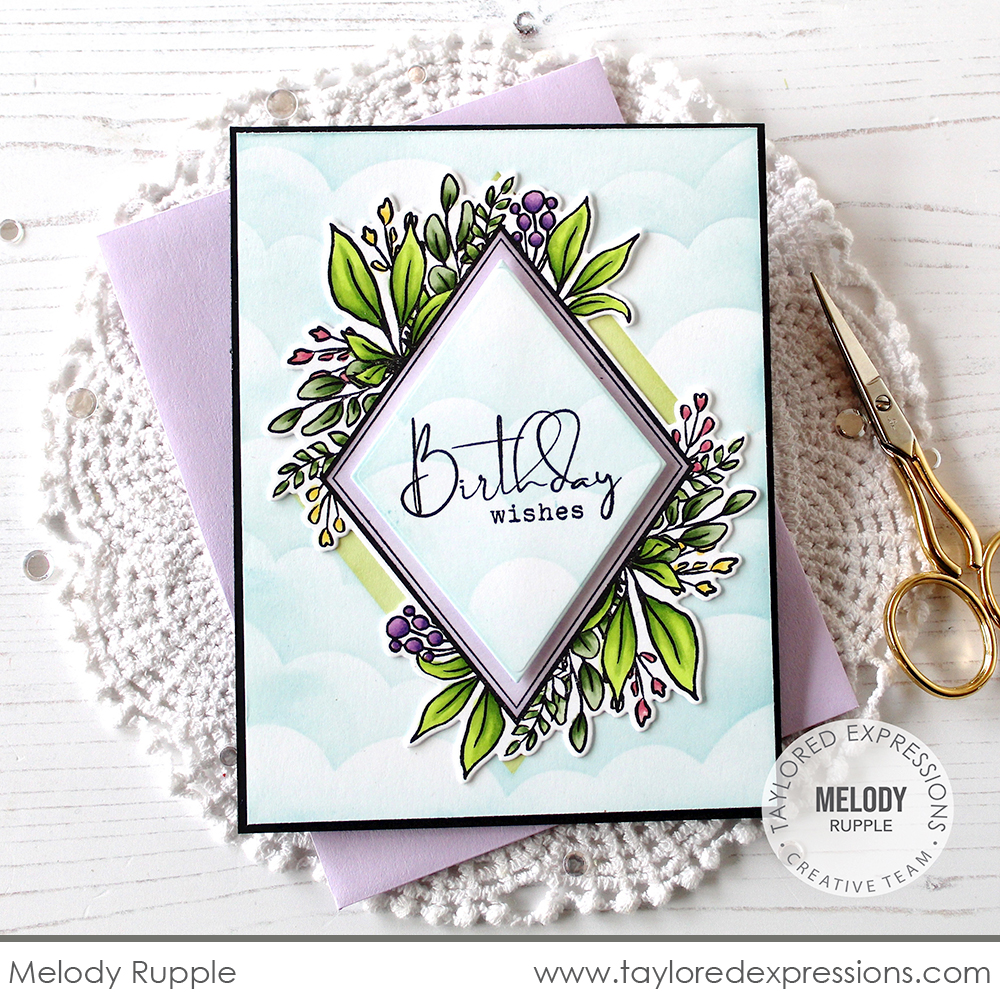
This birthday card created with the Diamond Botanical stamp set by Melody Rupple is so pretty! Melody used the Masking Stencils – Diamonds set to create the background, stenciling the diamond shape with Granny Smith ink and then masking it off to add the clouds surrounding it using the Set the Scene – Clouds Stencil Strips set. The frame image is colored with Copic markers and I love how Melody continued the clouds inside the frame with the ‘birthday wishes’ sentiment.
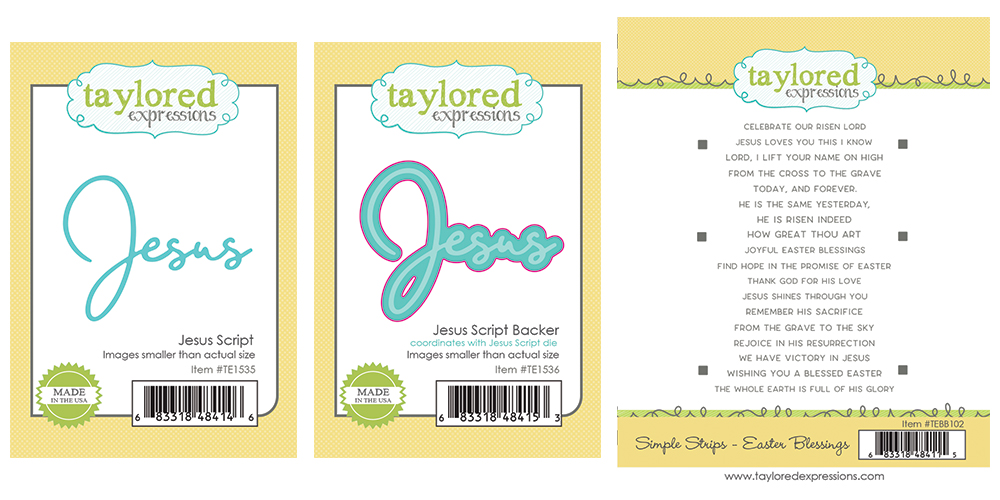
The Jesus Script die features a dainty font perfect for this special word! Use this die for sending inspirational and religious themed cards throughout the year. You can also layer it over the Jesus Script Backer die (sold separately) to add more dimension to the die cut word.
The new Simple Strips – Easter Blessings stamp includes 18 inspirational sentiments to celebrate the Easter Season. Use the innovative alignment guides to cut out all 18 sentiments with one pass through your die cut machine with the coordinating dies (sold separately): Simple Strips, Simple Strips – Well Rounded, and Simple Strips – Asymmetrical.
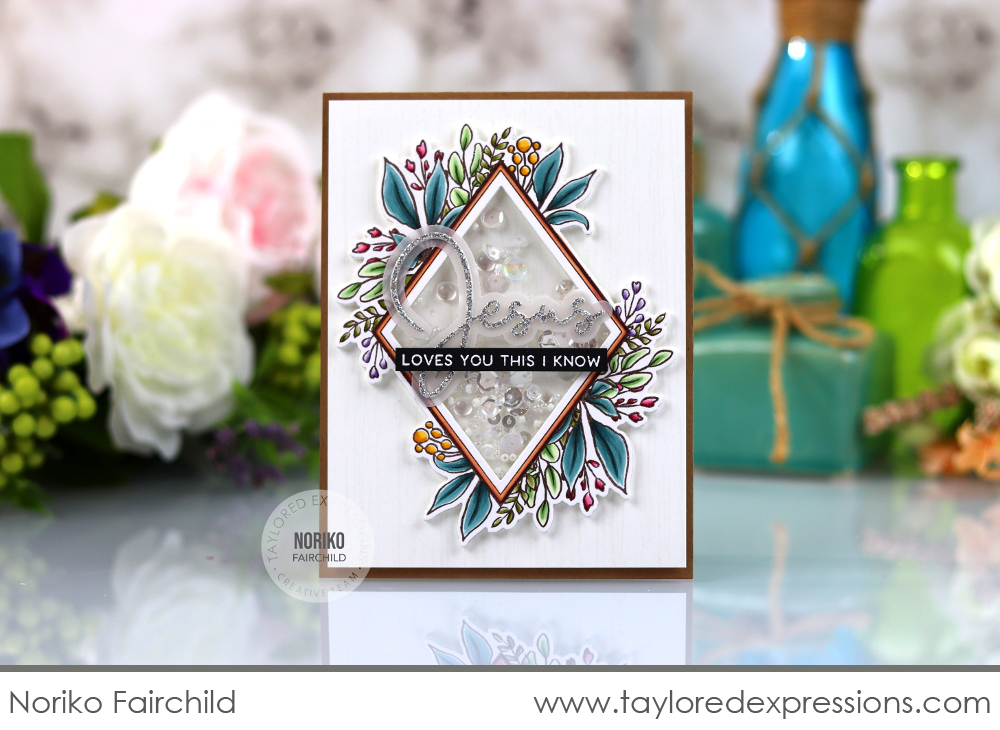
This card by Noriko Fairchild took my breath away! She created a shaker card with the Diamond Botanical stamp set (+ coordinating dies) and then layered the Jesus Script die cut over the top that she cut out silver glitter cardstock and backed with the Jesus Script Backer die cut from vellum. The ‘loves you this I know’ sentiment strip was embossed in white on Oreo cardstock using the Simple Strips – Easter Blessings stamp.
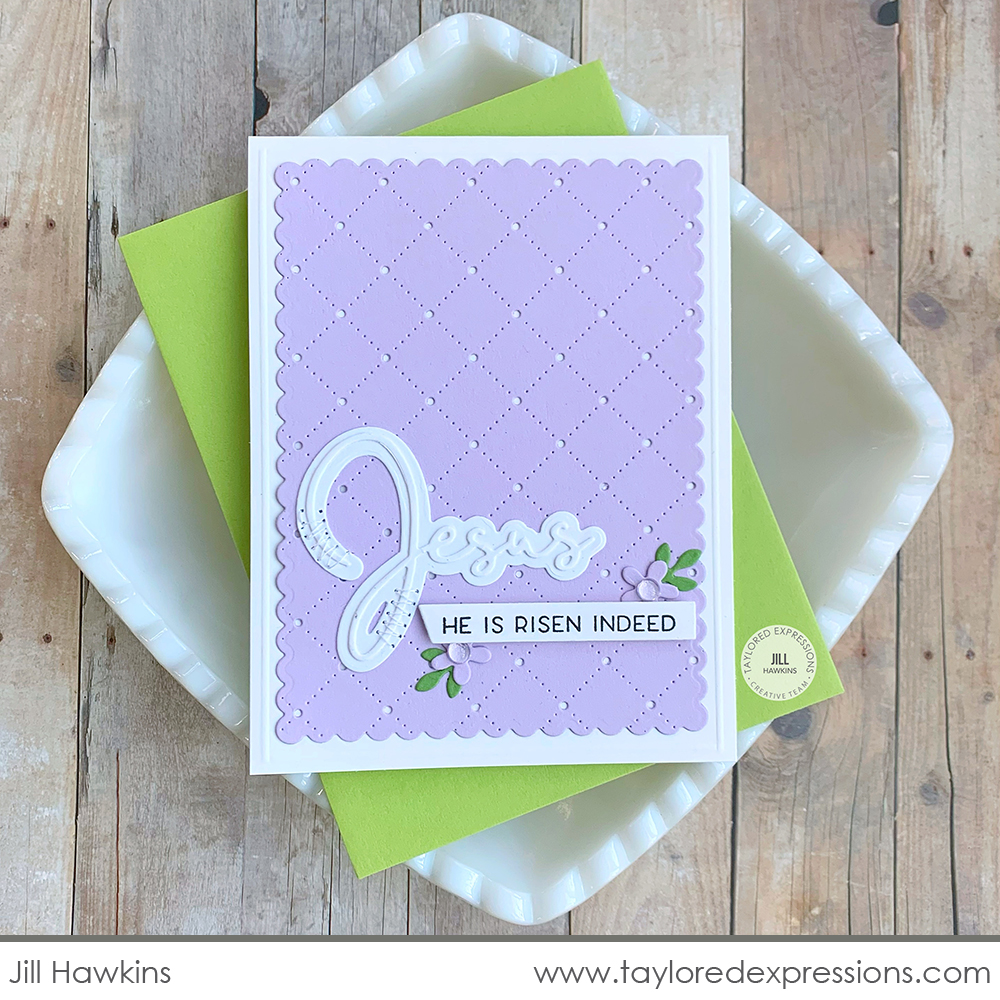
This Easter card was created by Jill Hawkins in a pretty Lavender Glaze color scheme. She die cut the background with a Petite Scallop Rectangle Stacklets die from a piece of Lavender Glaze cardstock that was die cut with the new Pierced Lattice Cutting Plate die. Jill die cut the Jesus Script and Jesus Script Backer dies from Sugar Cube cardstock and paired them with the ‘he is risen indeed’ sentiment from the Simple Strips – Easter Blessings stamp to complete the sentiment for her card. A few tiny Lavender Glaze flowers created with the Spring Wreath die collection and Bits & Pieces – Clear Drip Drops are the perfect finishing touch on this soft and sweet card.
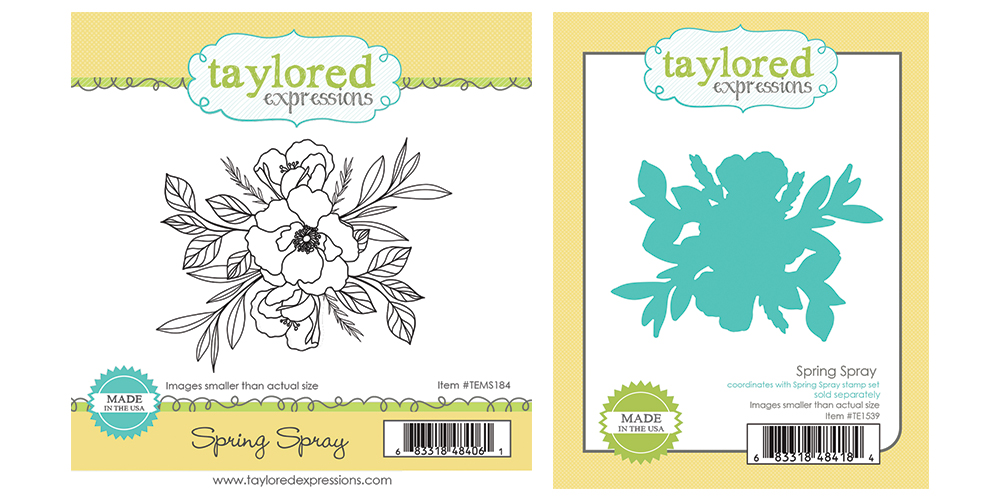
I don’t think you can ever have too many florals in your stamp collection and I know that the Spring Spray stamp (+ coordinating die) will be a perfect addition! This gorgeous spray of flowers is perfect to use with your favorite coloring mediums: Copic markers, watercolor, colored pencil, and more. Plus, florals like this work to use on cards and projects for so many different occasions!
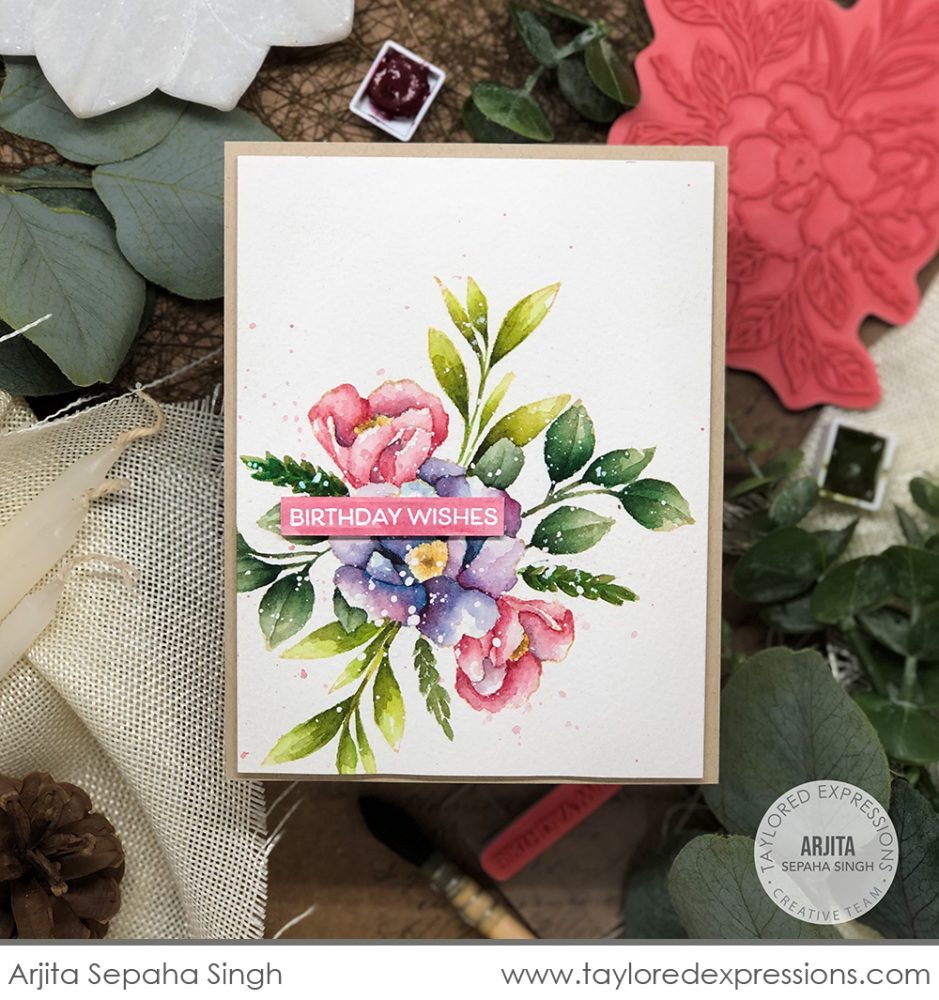
Here’s a no line coloring beauty from Arjita Sepaha Singh created with the Spring Spray stamp! She stamped the image in a light toned ink and then painted the the flowers in pretty purple and pink tones. I also love how she splattered white ink and pink watercolor paint over the top of the image. She added the ‘birthday wishes’ sentiment embossed in white on a strip of watercolor paper and then painted the strips with pink watercolor paint. Where the sentiment is embossed, it resists the color.
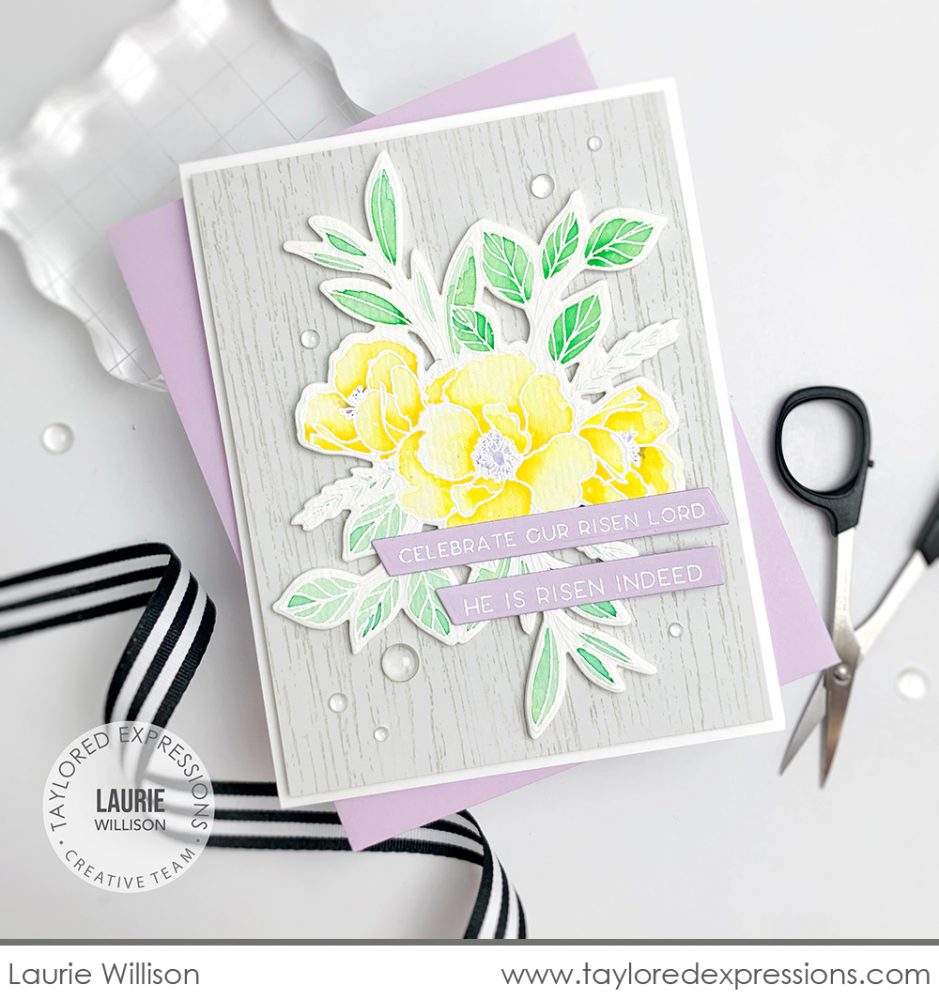
Laurie Willison embossed the Spring Spray image in white on watercolor paper and then added color to the image with watercolor paints. Where the image is embossed, it resists the color and I always love the look that is the result of doing the emboss resist technique! She added the flowers to a gray background that is stamped with the Wood Plank Background stamp. The sentiments are from the Simple Strip – Easter Blessings stamp set, are embossed in white on Lavender Glaze cardstock, and cut out using the Simple Strips – Asymmetrical die.
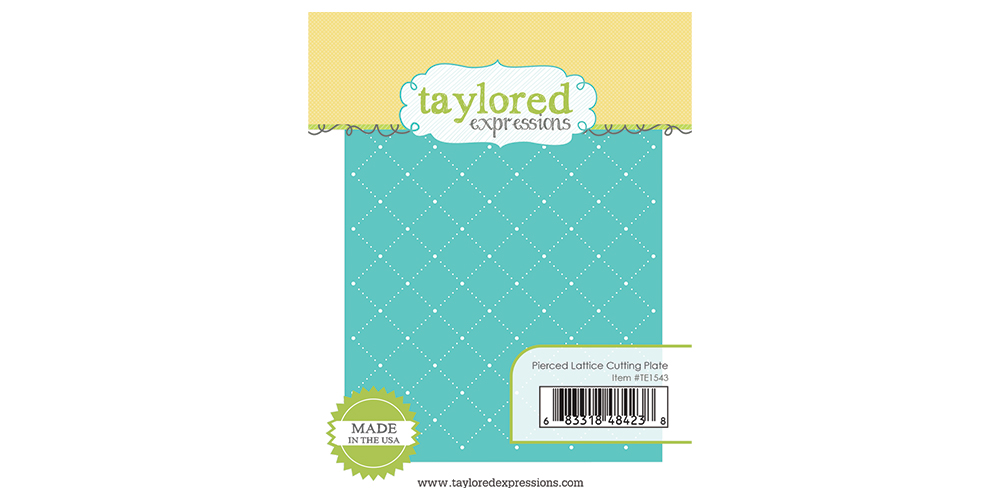
Add a pierced pattern detail to your A2 card background with the Pierced Lattice Cutting Plate die. The cutting plate impresses a pierced lattice design into your card from and cuts a tiny hole at the line intersections that will show a peek of the cardstock underneath.
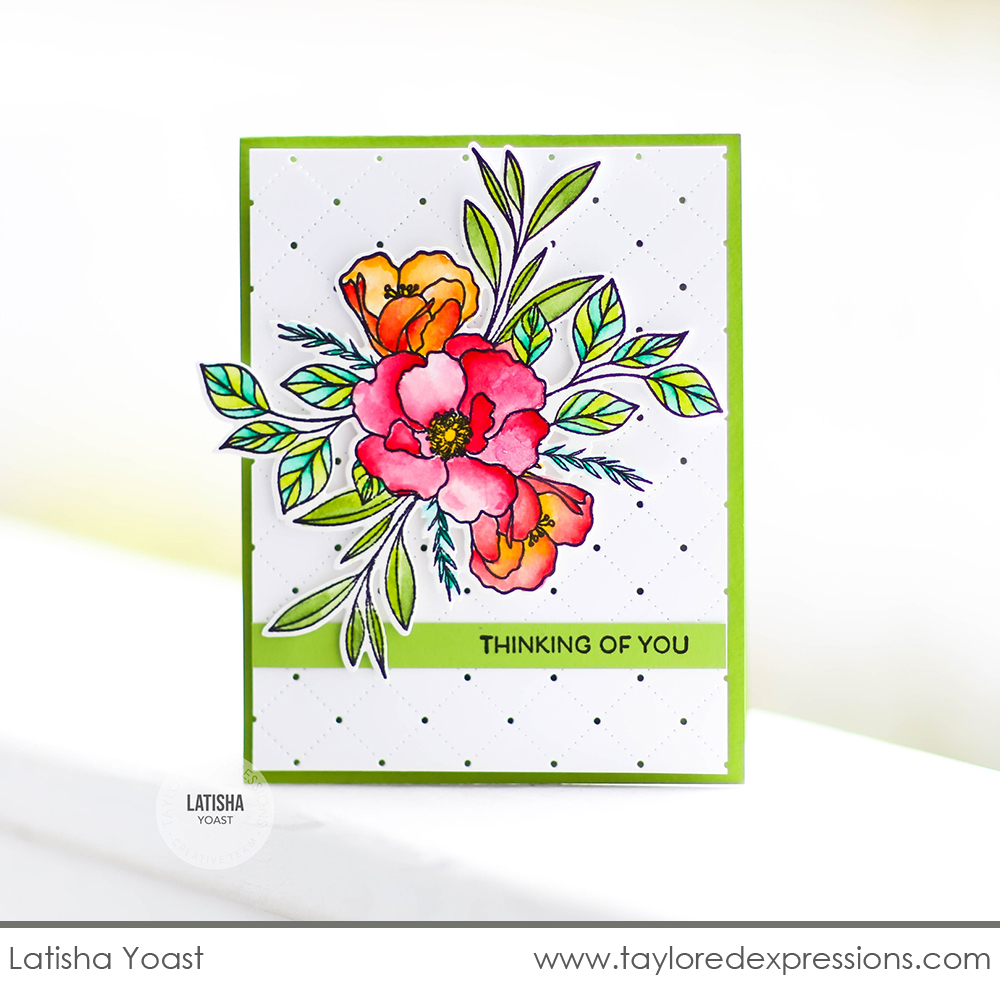
Latisha Yoast used the Pierced Lattice Cutting Plate die cut from Sugar Cube cardstock as a backdrop for the Spring Spray image. She layered it over a Lime Zest card base so there are peeks of green showing through the larger holes in the background. The Spring Spray image is stamped onto watercolor cardstock and Latisha added color to them using Karin Brushmarkers. The ‘thinking of you’ sentiment from the Be Joyful stamp set is stamped onto a Lime Zest cardstock strip to match the card base.
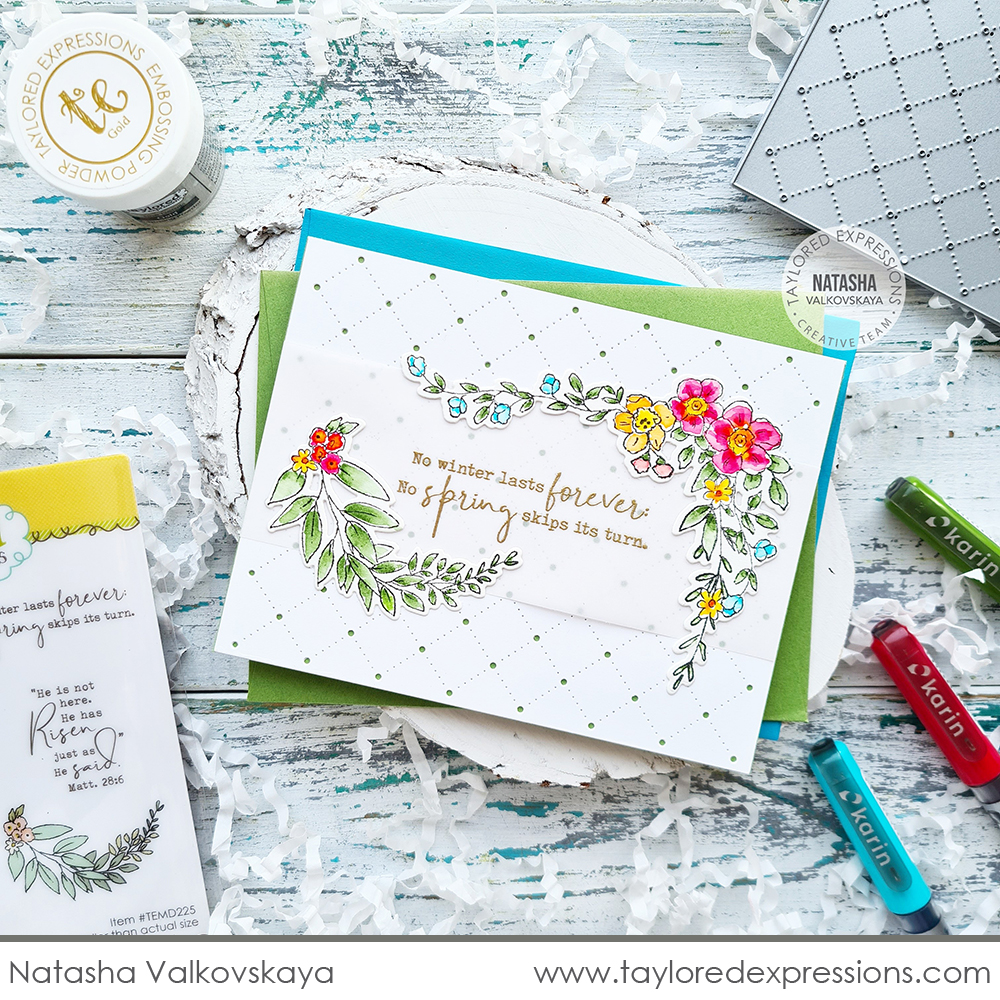
Natasha Valkovskaya used the new Pierced Lattice Cutting Plate die as a background to showcase the pretty floral sprays that she watercolored from the Unexpected Blessings stamp set. I love how Natasha embossed the sentiment in gold onto a vellum strip that goes across the card front. The vellum allows the sentiment to stand out while still showing the pretty pierced background behind it.

Join Taylor today for “T Time” at 1pm Central on the Taylored Expressions Facebook Page. We would love to have you join us for some crafty chat! Hope to see you there!
That wraps up the inspiration for our Easter and spring product release! We hope you enjoyed all of the projects we shared from the TE Creative Team – it’s always so much fun to see what everyone creates! Now we can’t wait to see what YOU create! Make sure to share on the Fans of Taylored Expressions Facebook Page. There will be more crafty inspiration happening on the TE blog next week. I hope you will stop back agin to check it out!
Did you know that you can subscribe to our blog and get our posts right in your inbox? Just sign up right HERE – that’s all there is to it to make sure you don’t miss any of our crafty inspiration!


