Mar 24, 2022
Crafting is in Full Bloom With the NEW Floral & Mother’s Day Products!

Hey, crafty friends! It’s Heather here and today I have more inspiration to share with the new products from our Floral & Mother’s Day release. I am pretty sure that many of you will agree that all of the new floral options were such a breath of fresh air! Florals are such versatile images that you can use all year round for just about any type of card and I, for one, love having a variety of options in my crafty stash. Get ready to scroll through a blog post of flowery inspiration for creating your next project – including a video from me using my new Planting Happiness stamp set!
Before we get to the inspiration, here’s one last reminder about the class with Taylor and me you can earn FREE with the purchase of the Triple Slim In the Garden Class Collection:
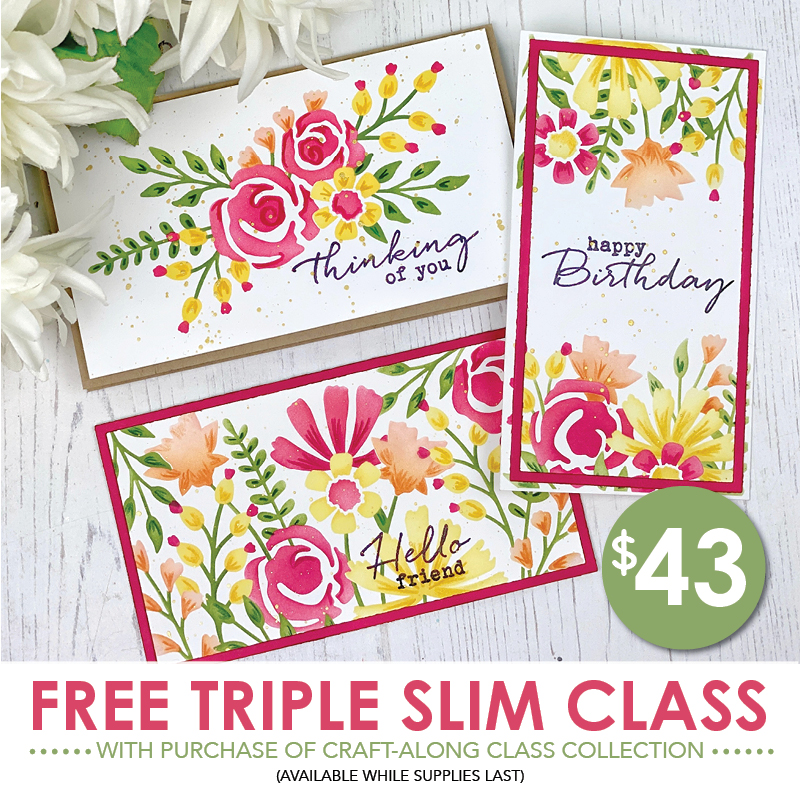
When you purchase the Triple Slim In the Garden Class Collection (Triple Slim In the Garden Layering Stencil set and Clearly Crafty Signature Sentiments stamp set) through Sunday, March 27th, you will get a FREE exclusive video craft along class with Taylor and Heather!
This mini version of our Online Crafty Classes is a great way for you to put your new goodies to use right away making 6 different card designs at your own pace! Watch the video as often as you like and learn some new crafty tips and tricks!
Once you complete your purchase, you will receive an email (separate from your order confirmation email) with links to the class video on YouTube.
Although Taylor and Heather will recommend extra supplies (ink, cardstock, embellishments, etc.), you can use anything you have to make these projects uniquely yours!
Hurry! This offer is only valid through 11:59 pm (CT) on Sunday, March 27th, or while supplies last. After the promotion has ended, the class will be available to purchase.
Click below to visit the new release products in the TE webstore and then keep scrolling for all of today’s inspiration!

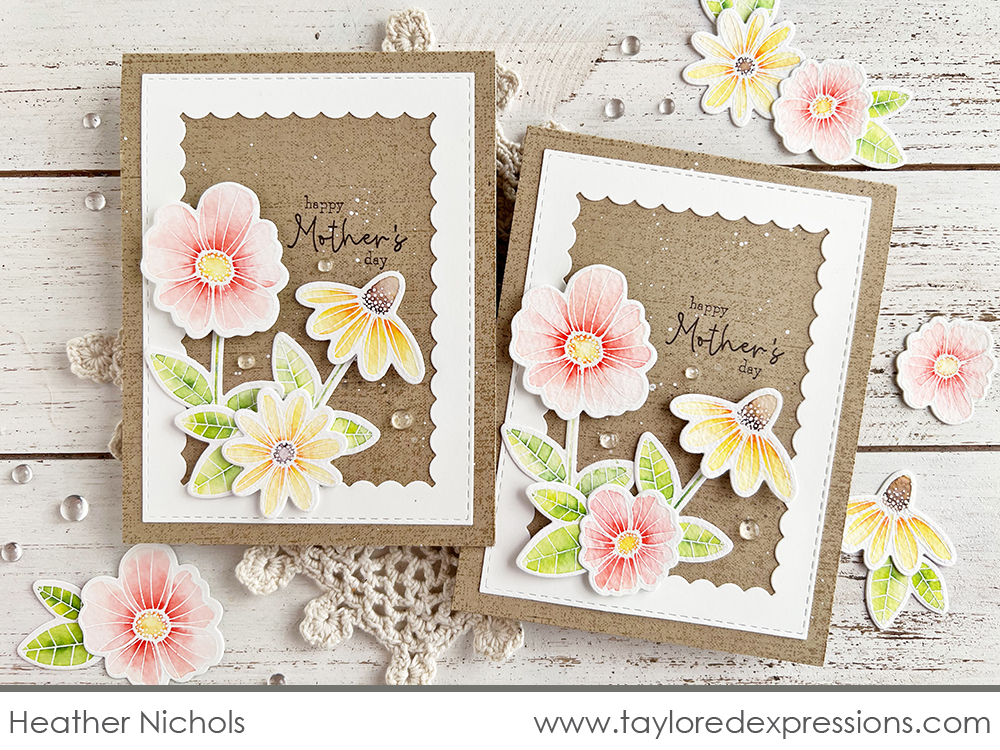
Today’s video is from me (Heather Nichols) and I am sharing a pair of Mother’s Day cards that I created with my new Planting Happiness stamp set. See how these cards came together from start to finish in the video below:
In the video, I share how I embossed the images from the Planting Happiness stamp set in white on 111 lb. watercolor cardstock and then colored the images with Karin BrushmarkerPRO markers and a watercolor brush. I cut the colored images out with the coordinating dies and added them onto a Toffee card base stamped with the Linen Background stamp and the ‘Happy Mother’s Day’ sentiment. The frame around the flowers is created with the Stitched Rectangle Stacklets and the Inside Scallop Rectangle Stacklets die collections. The cards are finished off with a few Bits & Pieces – Clear Drip Drops.
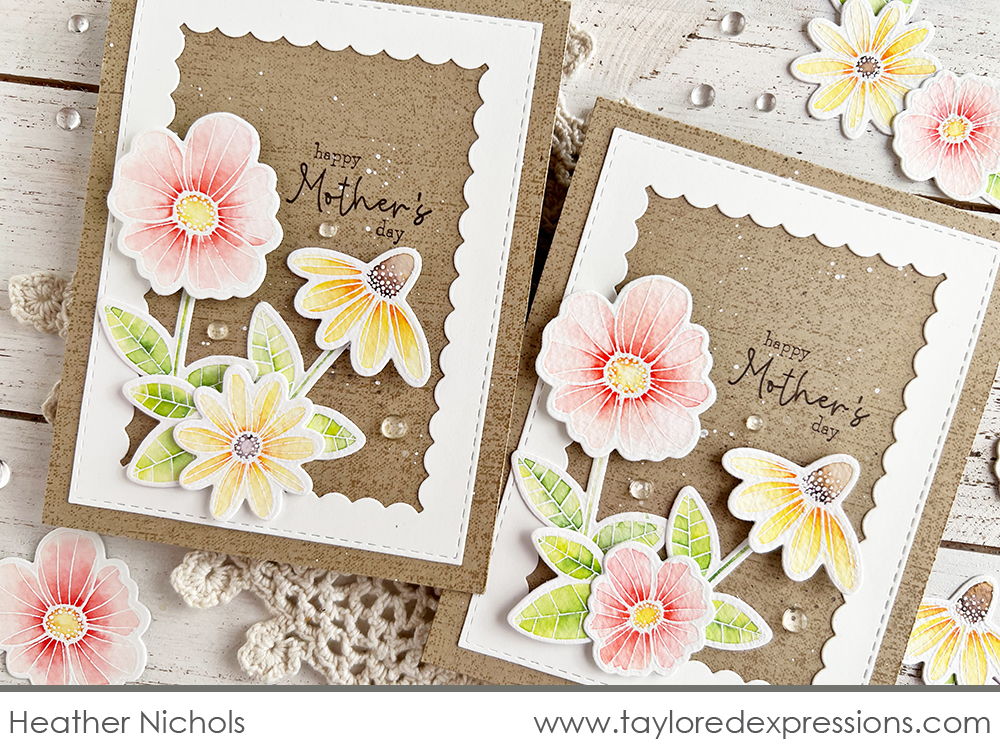
One of my very favorite ways to watercolor images is doing the emboss resist technique! Wherever the images are embossed, it resists water based mediums like watercolor paints or markers. I used the Karin BrushmarkerPRO markers to add color to the embossed images on the cards. The color is added using wet on wet technique: I wet the different areas of the image I wanted to add color to with water using a brush, touched the markers to the wet watercolor cardstock to add color, and used the brush to pull the color across the image to color it in. Watch the video above to get an up close look at the process and see what marker colors I used!
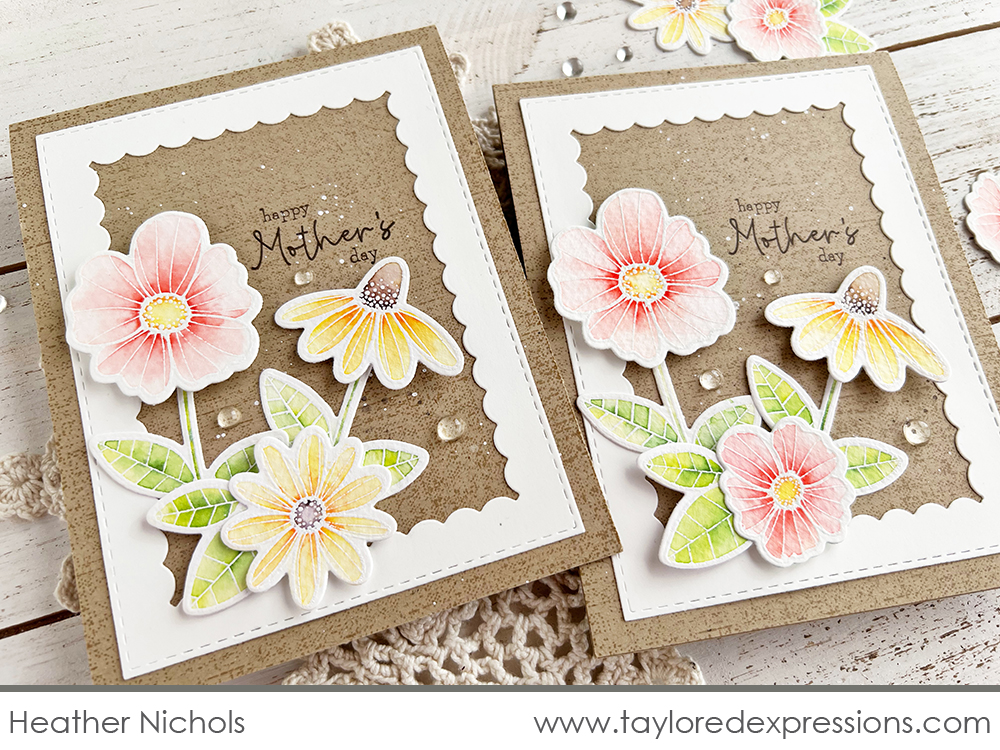
The flowers are arranged inside a frame for my cards and I adhered the elements both directly to the card base and also with foam adhesive to add dimension. There are endless possibilities with how you can add the blooms and leaves to your projects! While I made these cards specifically for Mother’s Day, the flowers in the Planting Happiness stamp set will work well for so many different occasions.
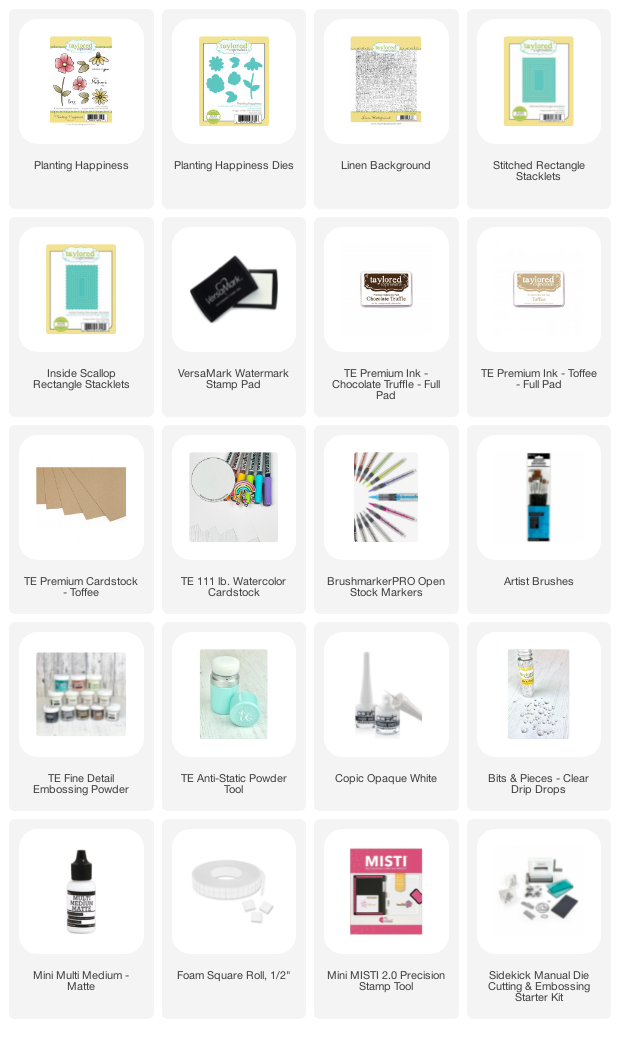
Check out the list below for all of the supplies that I used on my cards:

Here’s one more round up of inspiration from the TE Creative Team using the new products from the Floral & Mother’s Day release:
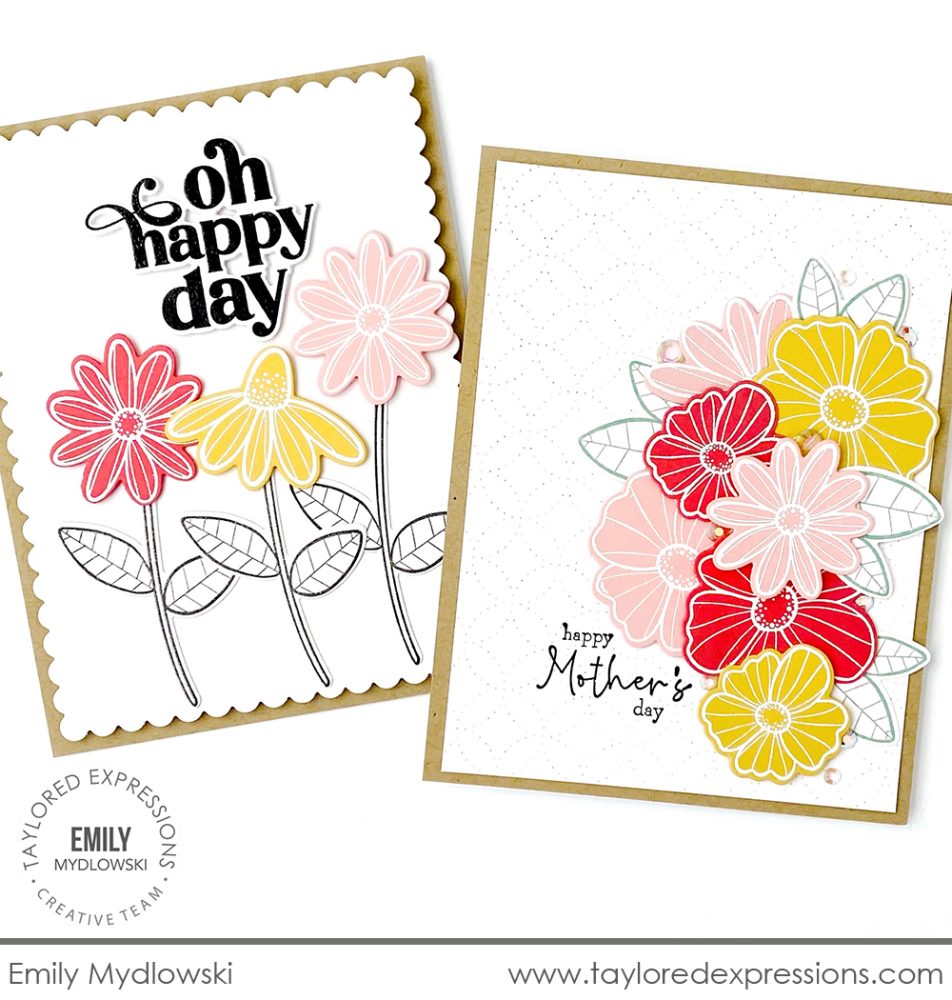
Instead of coloring, Emily Mydlowski embossed the blooms from the Planting Happiness stamp set onto different colors of cardstock on this pair of cards! It’s such a fun, graphic, and whimsical look! The flowers are added onto stems for the card on the left along with the ‘oh happy day’ sentiment from the It’s Your Day stamp set. For the card on the right, Emily arranged the florals together and added leaves stamped with Spearmint ink onto a background impressed with the Pierced Circles Cutting Plate.
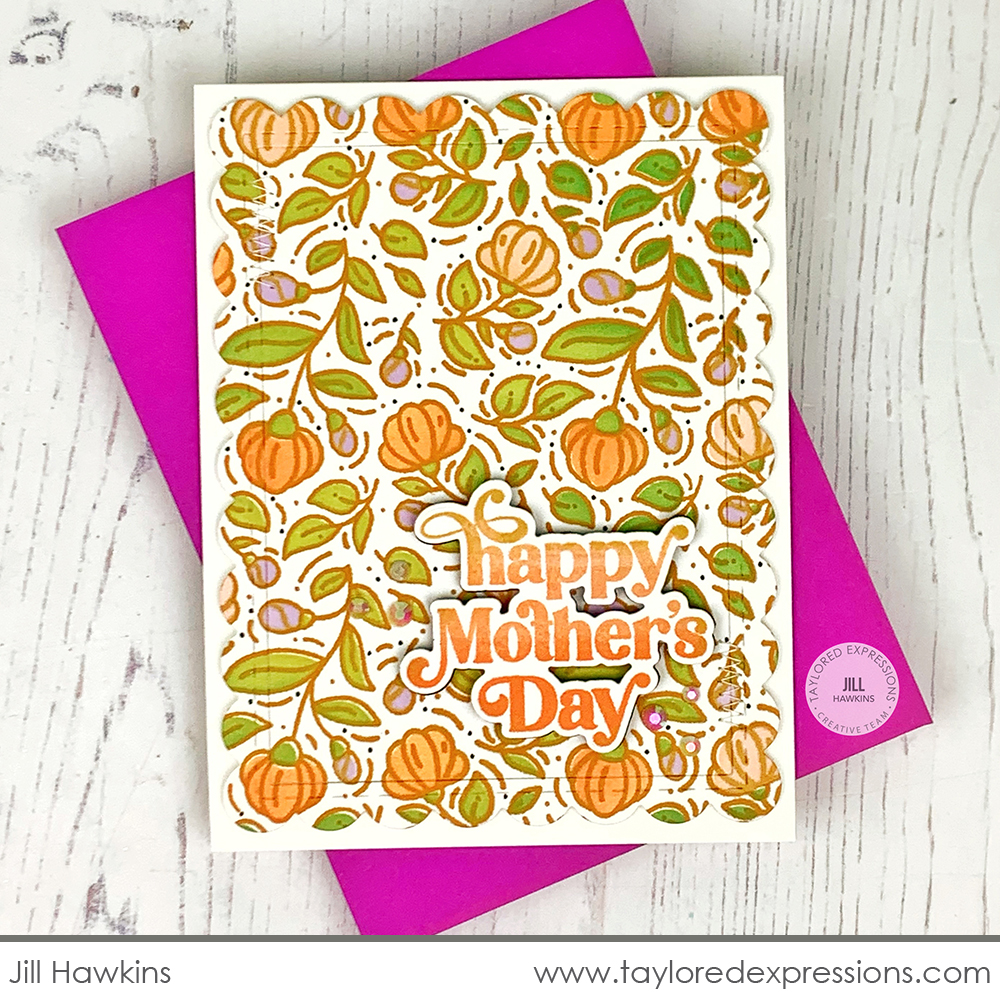
Jill Hawkins stamped the Flower Patch Background stamp in Honey ink, instead of the expected Oreo ink, and added color to the design with the Flower Patch Layering Stencil set. The background is cut out with the Frame in Frame 2 Cutting Plate die and Jill nestled the frame and insert piece together on the card. The sentiment is stamped with an ombre look with the Get the Word Out – Mother’s Day stamp, cut out with the coordinating die, and added to the flower background along with a few Bits & Pieces – Iridescent Rhinestones.
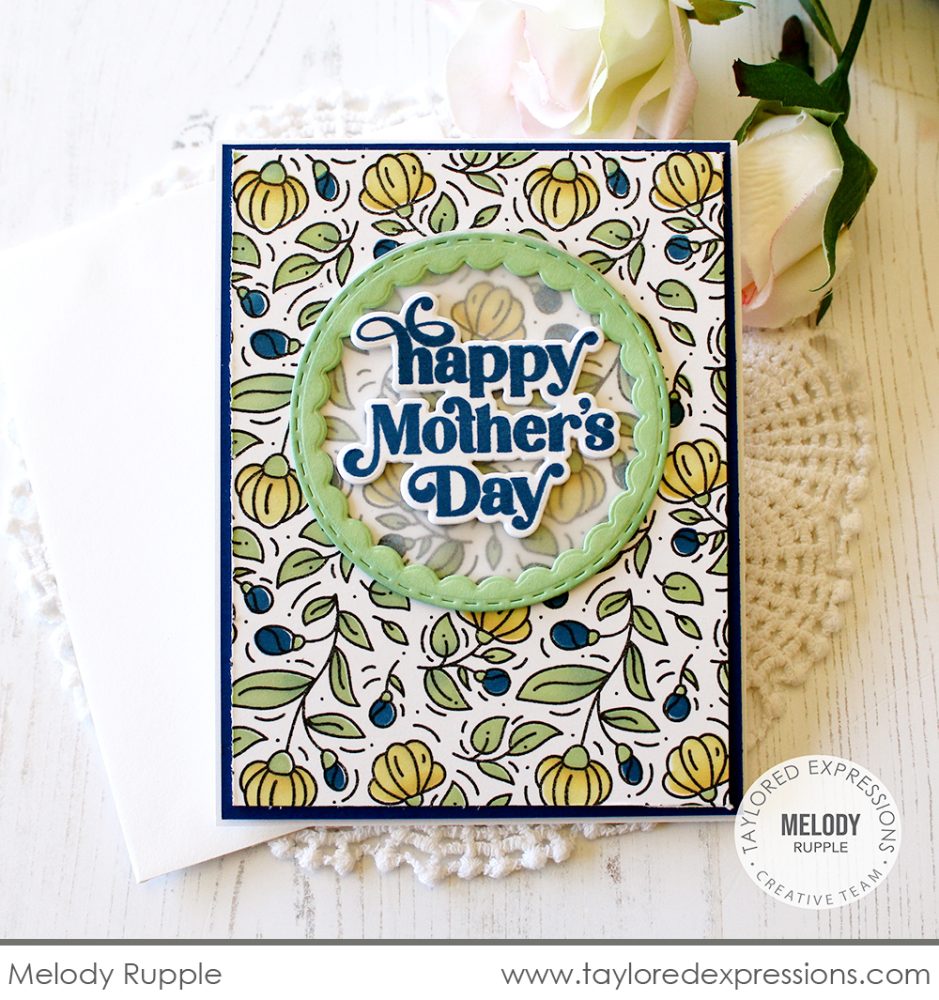
Melody Rupple stamped the Flower Patch Background in Oreo Ink and colored in the blooms with the coordinating Flower Patch Layering Stencil set using Blueberry, Potato Chip shaded with Pineapple, and Mint Julep shaded with Peapod inks. She added the Get the Word Out – Mother’s Day sentiment stamped in Blueberry ink into a frame created with the Stitched Circle Stacklets and Inside Scallop Circle Stacklets die collections to add to the background – I love the layer of vellum behind the frame to help the sentiment stand out on the card!
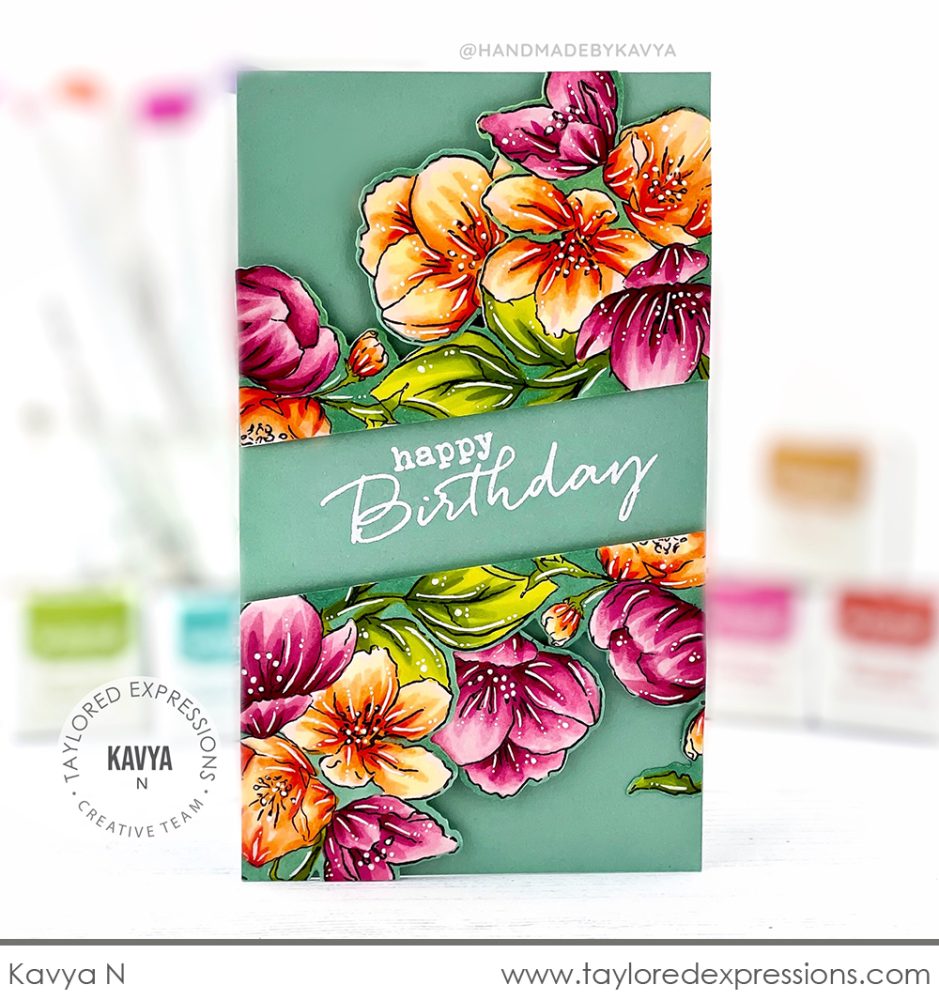
Kavya cut apart the frame image from the Fancy Florets stamp set and set the pieces at a diagonal on this Mini Slim birthday card to highlight the sentiment. The blooms are colored with Copic Markers with white gel pen highlights and Kavya colored the borders around the images with a color to match the Spearmint Mini Slim card base. The ‘happy birthday’ sentiment is from the Signature Sentiments stamp set and is embossed in white.
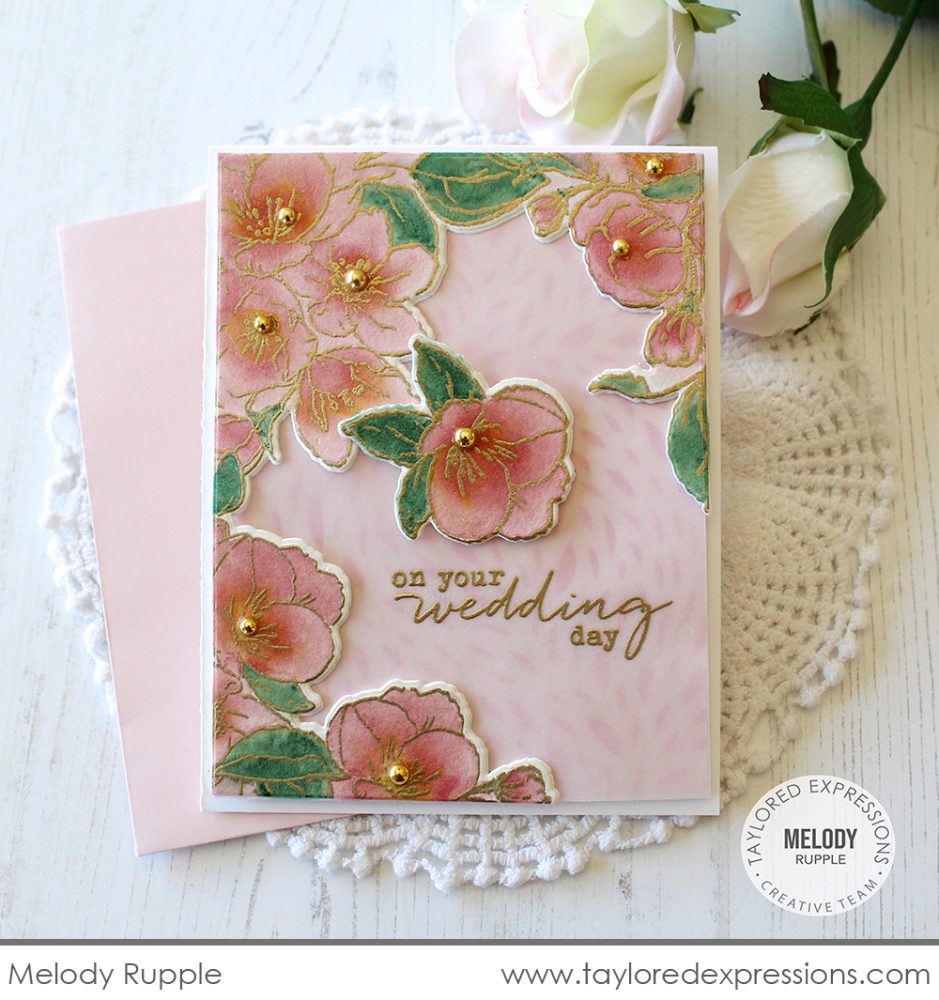
I love the soft and pretty look of this wedding card by Melody Rupple created with the Fancy Florets stamp set! She embossed the blooms in gold on watercolor cardstock and added color with Raspberry Sorbet and Spearmint liquid watercolors. After cutting them out with the coordinating dies, Melody added the florals to a background stenciled with the Pretty Petals stencil on Cupcake cardstock. A layer of vellum is added over the background to soften the look. The ‘on your wedding day’ sentiment from the Signature Sentiments stamp set is embossed in gold and Melody added Bits & Pieces – Gold Drip Drops to the centers of the flowers.
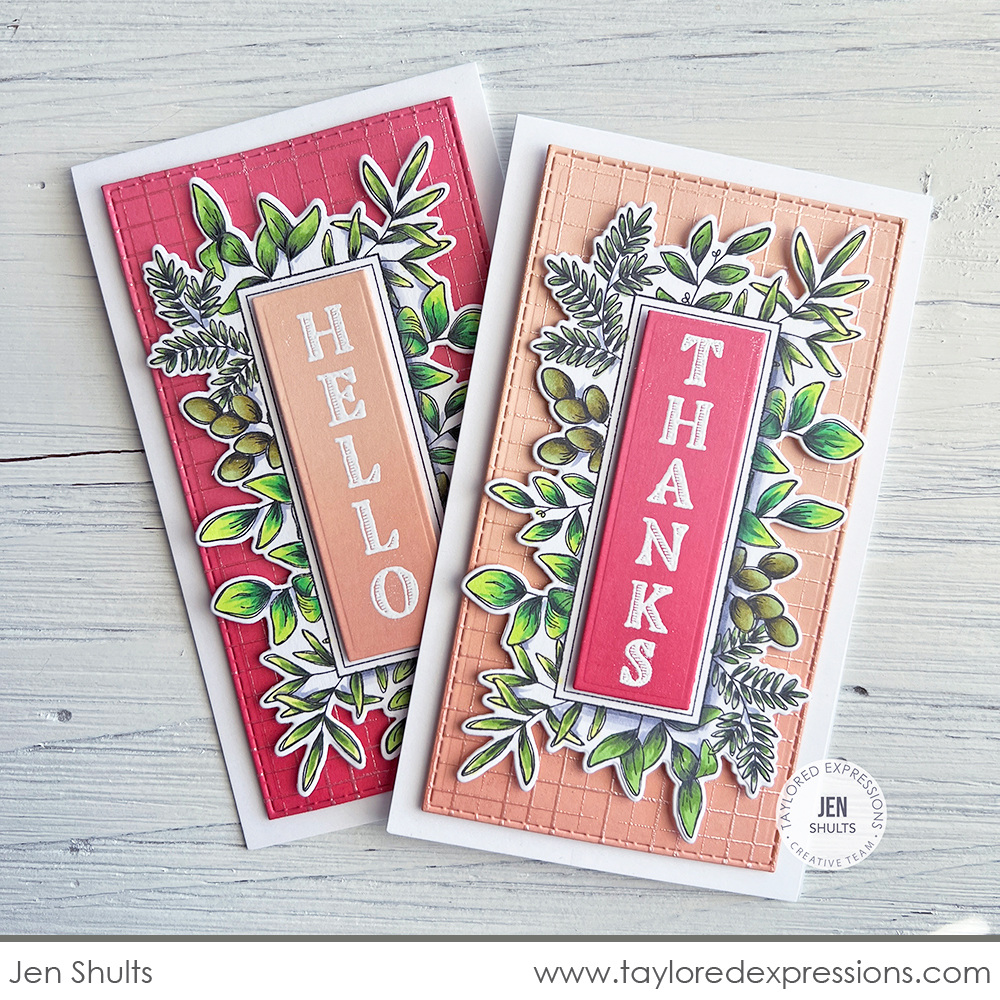
This pair of cards by Jen Shults showcases the Mini Slim Botanical stamp. Jen colored the botanical frame image with Copic markers and cut out the frame with the coordinating die. She added vertical sentiments to the cards with the Mini Slim Botanical Sentiments stamp set embossed in white on Peaches ‘n’ Cream and Guava cardstock. The frames are set onto backgrounds embossed with the Rough Draft Background stamp and cut out with the Stitched Mini Slim Stacklets die collection.

Emily Mydlowski tipped the Mini Slim Botanical frame in a horizontal orientation for this Mini Slim card. She embossed the frame in silver and cut it out with the coordinating die, leaving the center of the frame intact by removing the center thin rectangle die. She added the ‘thinking of you’ sentiment from the Mini Slim Botanical Sentiments stamp set into the center of the frame and added it to a blended ombre background created with Blueberry, Spearmint, and Mint Julep ink.
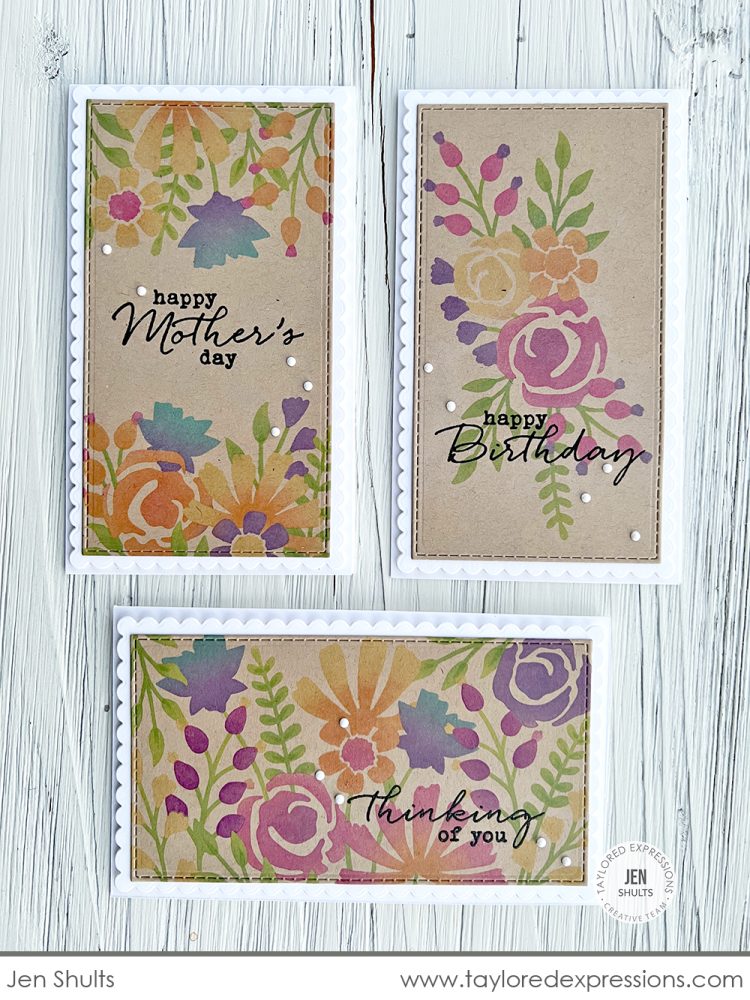
Jen Shults created a trio of Mini Slim cards on Toffee cardstock using the new Triple Slim In the Garden Layering Stencil set. Stop by Jen’s blog for details on all of the ink colors and tips and tricks Jen used to stencil the four layers! Jen cut out the floral panels with the Stitched Mini Slim Stacklets die collection and then layered them onto Petite Scallop Mini Slim Stacklets die cuts before add them to Mini Slim card bases. The sentiments from the Signature Sentiments stamp set are stamped in Oreo ink on each card. The finishing touch is a sprinkling of white Tiny Diamonds around the sentiments!
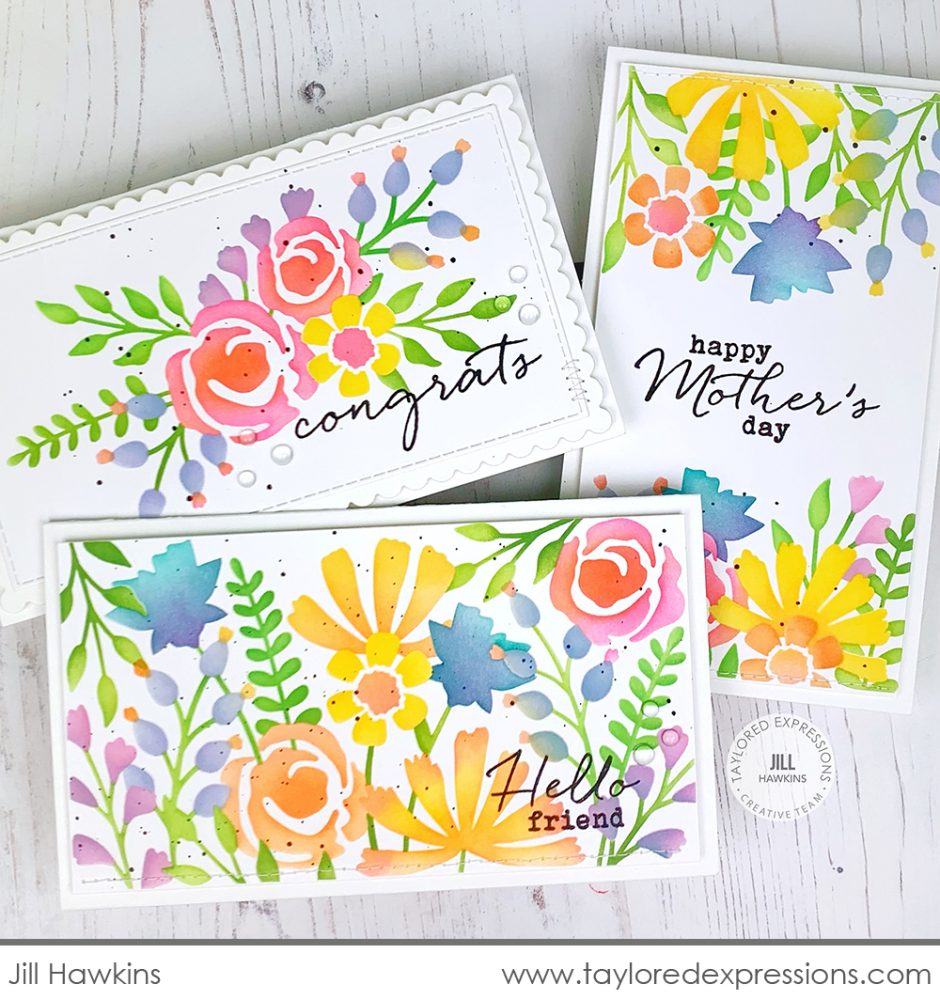
Jill Hawkins created the most colorful gardens on her set of Mini Slim cards with the Triple Slim In the Garden Layering Stencil set. I am pretty sure I heard that the final count for ink colors was at least 14! Even though there are only four layers, you can add as many colors as you would like as you stencil all of the blooms for your projects. Jill added sentiments to each card from the Signature Sentiments stamp set and added Bits & Pieces – Clear Drip Drops to finish them off.

Today, join Susan Block live for “T Time” at 10AM Central on the Taylored Expressions Facebook Page. She’ll be sharing a fun crafty project and more! We hope to see you there – come join in the fun! (Don’t worry, if you miss the live you can always watch the saved broadcast afterward!)
Thank you for joining us this week and for the excitement over the new products in our Floral & Mother’s Day release! We can’t wait to see your creations and hope that you will share them with us and other TE fans on the Fans of Taylored Expressions Facebook Page – if you aren’t a member of the group, come join us! Next week brings you our newest kit! Stop by the blog this weekend for a sneak peek!
Did you know that you can subscribe to our blog and get our posts right in your inbox? Just sign up right HERE – that’s all there is to it to make sure you don’t miss any of our crafty inspiration!


